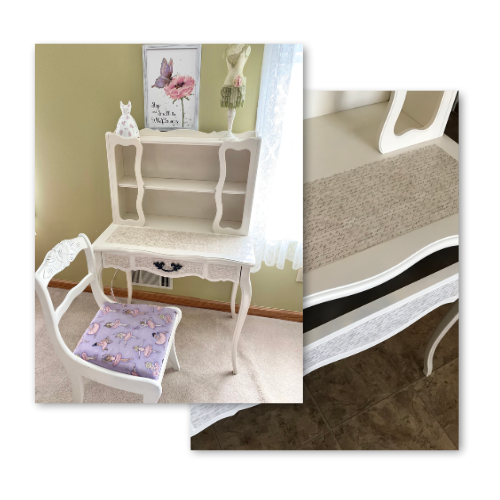
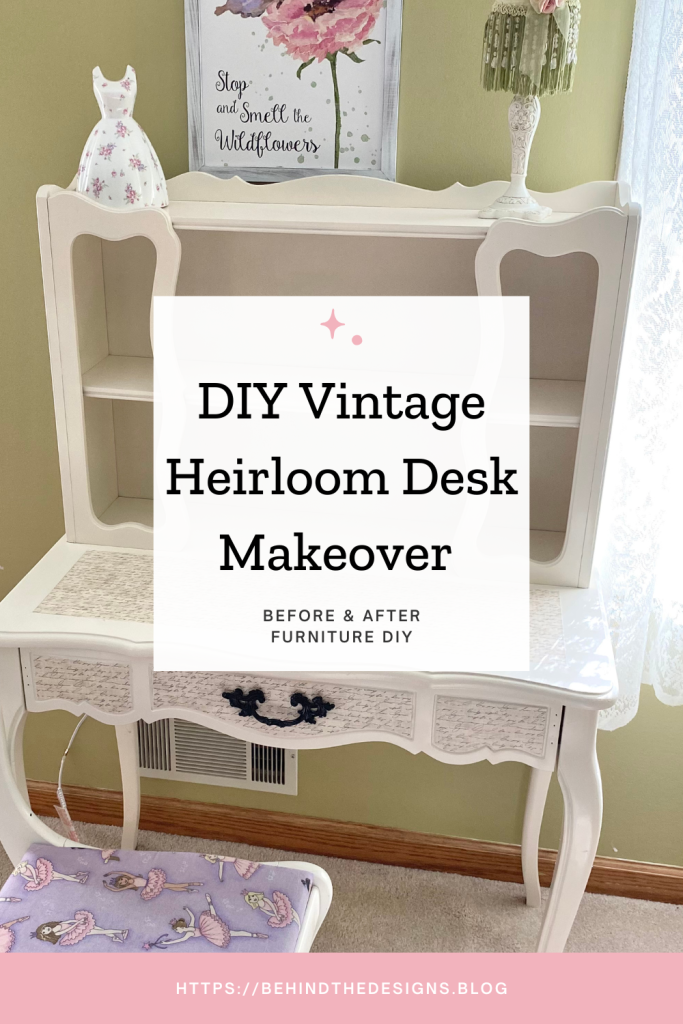
DIY Vintage Heirloom White Desk Makeover
Giving old furniture a fresh new look is an exciting project to take on; plus it’s good for the environment! See how I turned this tired old desk from a drab brown to an heirloom white using spray paint and decoupage. It’s perfect to use as as desk or a girls vanity!

This vintage desk was gifted to my daughter by her aunt. It came with no background or history as the aunt wasn’t sure of the track it took to get into her hands. I’m not quite sure if it is a makeup vanity or desk. But, it was a perfect fit for my daughter and the chair she already had.
You might remember the chair, it too was a DIY furniture makeover project. Be sure to check out the DIY Trash to Treasure Rose Carved Chair Makeover. It was like kismet that these two pieces came together.
don’t miss out!
Get more furniture makeover project ideas plus tips and tutorials!
I love to refinish old furniture because I’ve found older furniture is usually better constructed and made with real wood. The only downfall of refurbishing older furniture is that it may come with a smoke smell and sometimes not even TSP cleaner and airing it out will clear the smell. It really depends on the piece of furniture, what it’s made of and how long it may have been exposed.
But don’t let that deter you from looking at older furniture, there are just too many pros to finding that diamond in the rough!
When I paint furniture there are a few supplies that are just a must. On top of my list is, of course, spray paint. It’s the quickest and easiest way to update just about anything. The plethora of colors to choose from in spray paint is like trying to decide what candy you want from the candy store.
Supplies Used
- TSP cleaner
- Fine sand paper
- Spray paint (I used Rust-Oleum American Accents 2X Paint + Primer in Heirloom White)
- Mod Podge
- Sponge brush
- Scrapbook paper
- Spray paint Gloss Black
I try my best to always spray paint furniture outside to avoid the cluster of paint fumes in the house or garage. I placed the desk on a large board to protect the grass a little (you could also use paper under the desk too).
DIY Vintage Heirloom White Desk Makeover Details
A good amount of my time was also spent researching this piece. I’ve always found it fascinating to find out as much as I can on a piece I’m refurbishing. But, sadly, I didn’t find anything. I couldn’t even find similar pieces to this one.
So, if you come across my post and know anything about the style, year made or anything, please feel free to drop me a comment. I’d love to know a little more about the origins of this well crafted piece of vintage furniture.
1
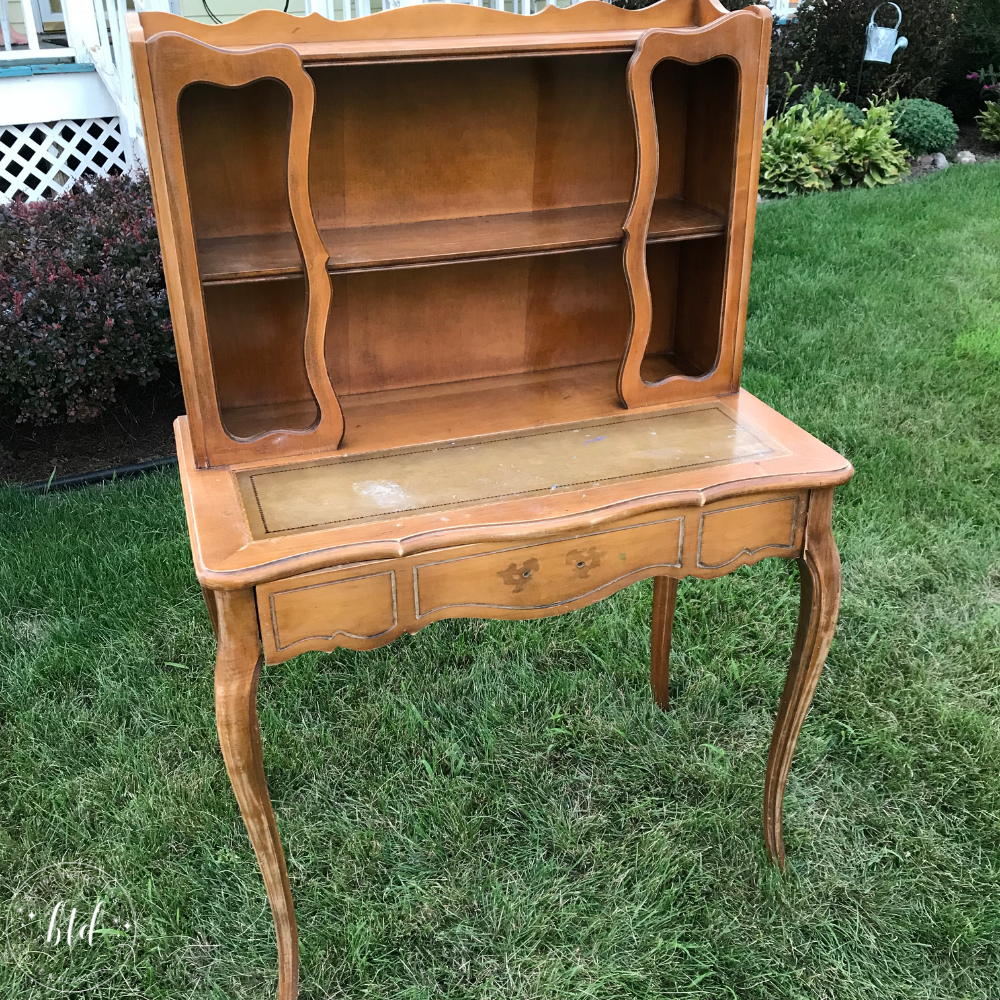
Furniture Before
The desk before the makeover wasn’t a terrible color; it just needed to be shown a little TLC. To be honest I was floored that I even remembered to get a before picture! I tend to be so eager to get started and see the end result that I sometimes forget to grab a before picture.
Technically, I didn’t get a true original before picture because, if I recall correctly, the top shelf area had a set of small fabric like curtains on the two front panels. We had taken that off soon after it was given to us.
2
Prep, Clean & Spray Paint
- I took off the drawer handle, cleaned it with a wire brush, lightly washed with hot soapy water and let air dry.
- Using TSP cleaner, I wiped down the whole desk; you’d be surprised by the amount of goop and grim that comes off an older piece of furniture!
- Next, I lightly sanded down the whole desk with fine grit sand paper.
- Thoroughly wiped the desk down with a clean, very lightly damp, cloth.
- I let the desk air dry for about a half-hour.
- Then I started spray painting the first coat which I let it sit for an hour. I always recommend two coats of paint for a nice even finish.
- After the first coat was dry I spray painted a second coat (in between each coat I would let it sit about an hour, lightly sand where needed and wipe it down lightly before applying the next coat).
- Last step was to let it fully dry overnight before starting work on the desktop and drawer front.
In the end, this vanity desk took four coats of paint! I just kept painting until I got the result I wanted.
DIY Tip: If you have to use more than two coats of paint to cover a piece of furniture, especially a wood piece, it’s likely because the wood is dry.
Although, once I was half way through painting the desk I realized it wasn’t the same spray paint color as the ballerina chair. I completely missed that because I was so eager to just get the project started. The chair was a gloss white and the desk ended up being heirloom white.
But, I didn’t worry too much about it because I knew my daughter would eventually change her bedroom theme. When she did I would just repaint both!
3
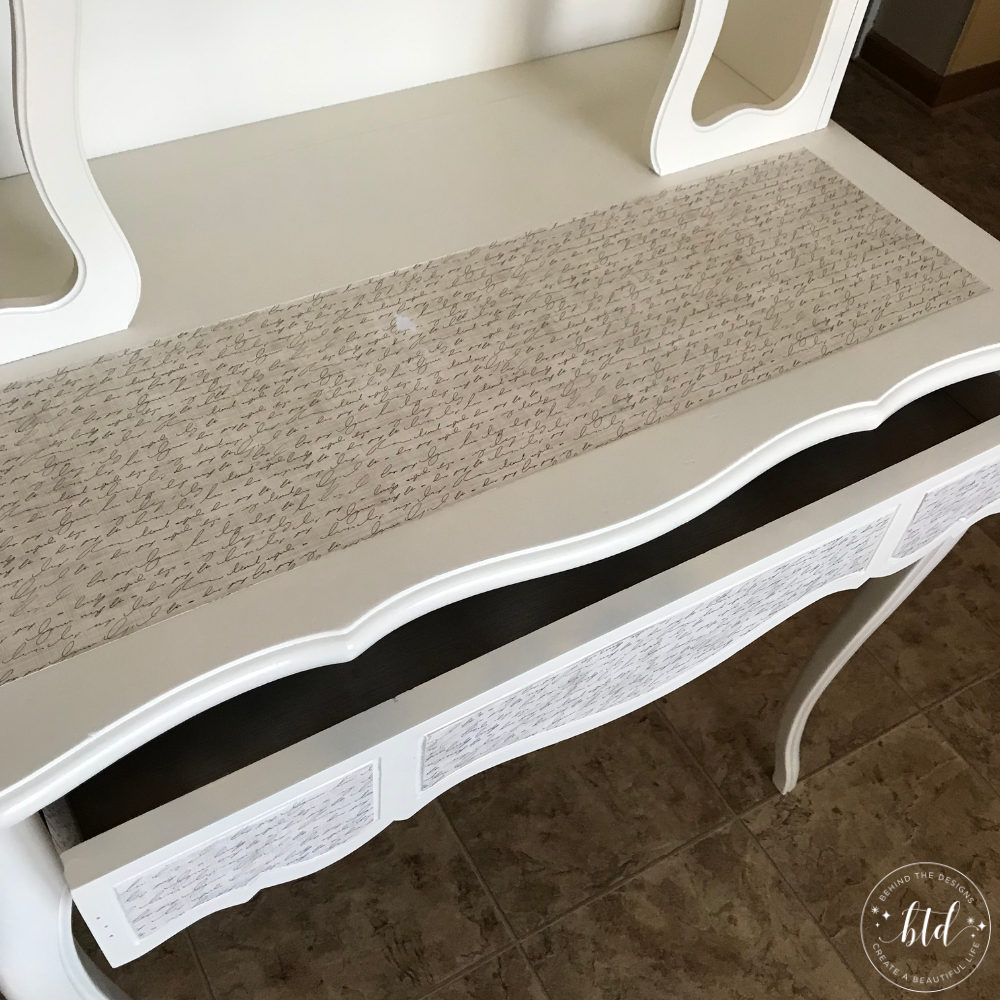
Decoupage Insets
To get started on the desktop (to cover that ugly darker brown square) I used washi tape to line up the wording of the scrapbook paper. Once I lined up the paper, I put a coating of mod podge down to adhere the paper to the desk. Everything worked perfectly until…
I tore the scrapbook paper trying to get the washi off. I waited too long to pull the tape off. It didn’t look too horrible so I just went with it.
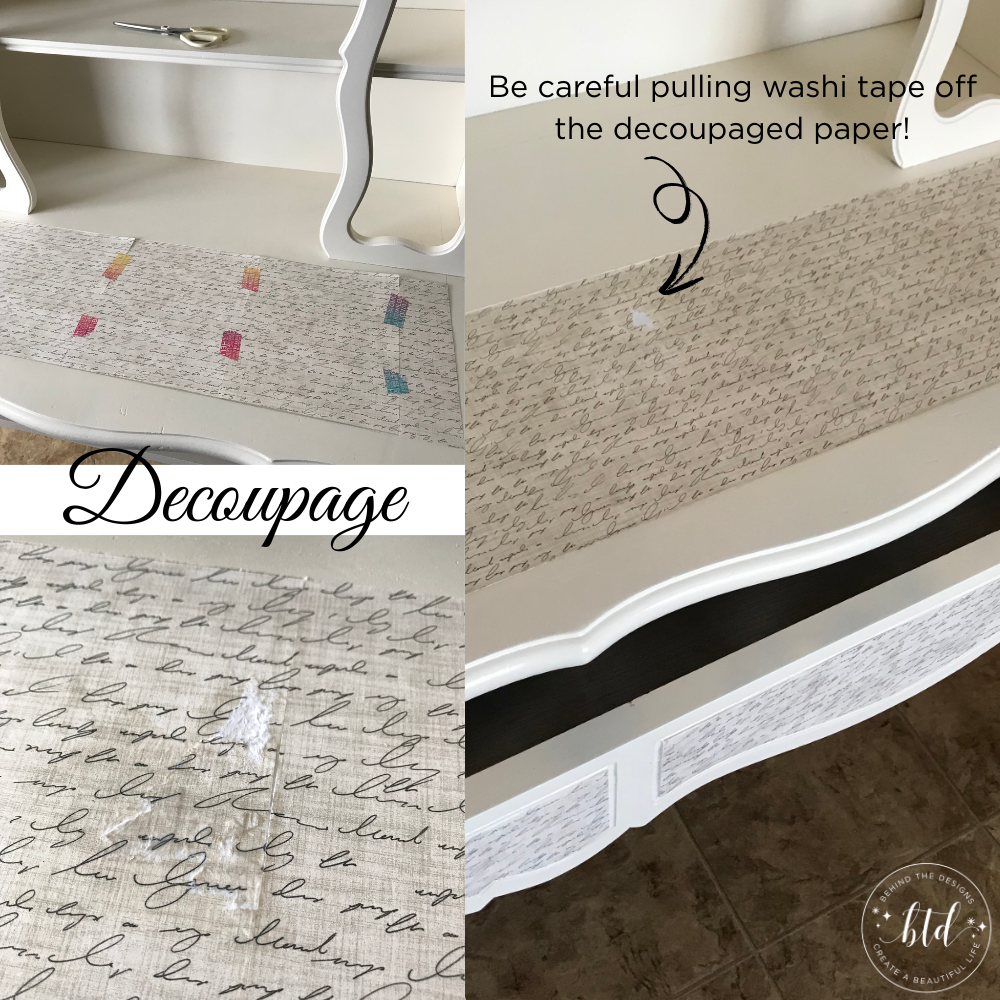
Next, you have to seal the paper using another coating of mod podge.
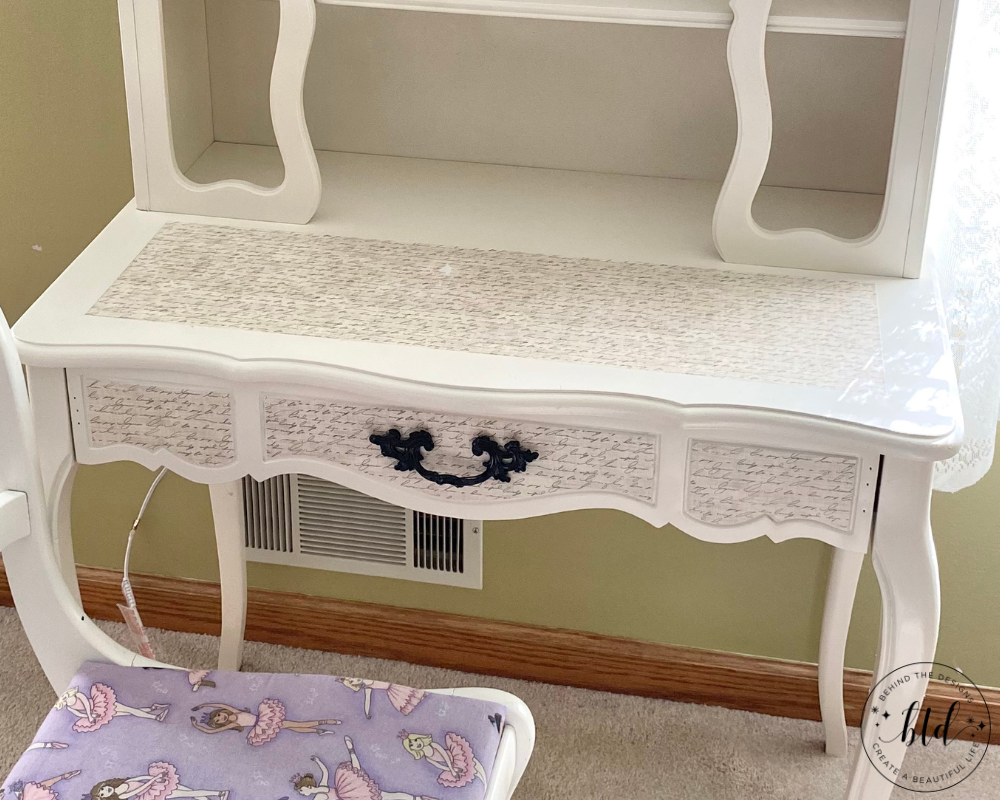
I followed these same steps for the drawer front, except I had to cut out the paper to match the curves of the insets.
4
Spray Paint handle
The final step in this furniture makeover project was to spray paint the handle black. Once again I let everything dry overnight. The next day it was ready to be put back together. For now, I haven’t decided if I want to use the same scrapbook paper on the inside bottom of the drawer, paint it or maybe use a newspaper and mod podge it on.
Future plans would be to either put the same scrapbook paper on the back of the vanity top or use a floral stencil, either choice will really make it look even more beautiful. I love how this spray paint project came out and can’t wait to change the chair to match. Perfect match for the romantic at heart!
Were you inspired to DIY A Furniture Makeover?
Mention us @behindthedesigns or tag us using #btdinspired so we can see your creations! You can also leave a comment below!

Want to always be in the know? Be sure to subscribe to the newsletter to receive emails of all the latest blog posts and get the first scoop about any digital printables and freebies.
Join me on Instagram, Pinterest, Facebook and the Creative Planning Expressions Community to see what I’m up to as I Create a Beautiful LifeTM!