
Let’s transform a plain wood heart ornament into a beautiful piece of wall decor! All you have to do is add pink paint, Cricut vinyl and you’re done. This DIY Valentine’s Day Wood Heart Decor project idea is also perfect to use as a gift topper!

When it comes to Valentine’s Day craft projects I’m all in! Although I’d have to say when I purchased these wood heart ornaments I wasn’t entirely sure what I was going to do with them. But I did know that the wood heart bead frames would be included in whatever craft I came up with…so I grabbed them too!
Of course, what Valentine’s Day craft is complete without some pink in it. This Cricut project was easy to create…though it was harder to get finished pictures because I kept eating all the conversation hearts candies!

don’t miss out!
Get More Valentine’s Day Craft Ideas, Freebies and Special Offers Straight To Your Inbox!
I love adding pops of Valentine’s Day decor and colors throughout my home. I’d have to say there’s at least one home decor item in every room of the house from pink and red colors to hearts and arrows. I just love, love.
As I was typing up this post the ideas for these wood hearts and heart bead frames just kept popping into my head. While you didn’t see me…I stopped to write them all down for future posts! Now let’s get on to this craft.
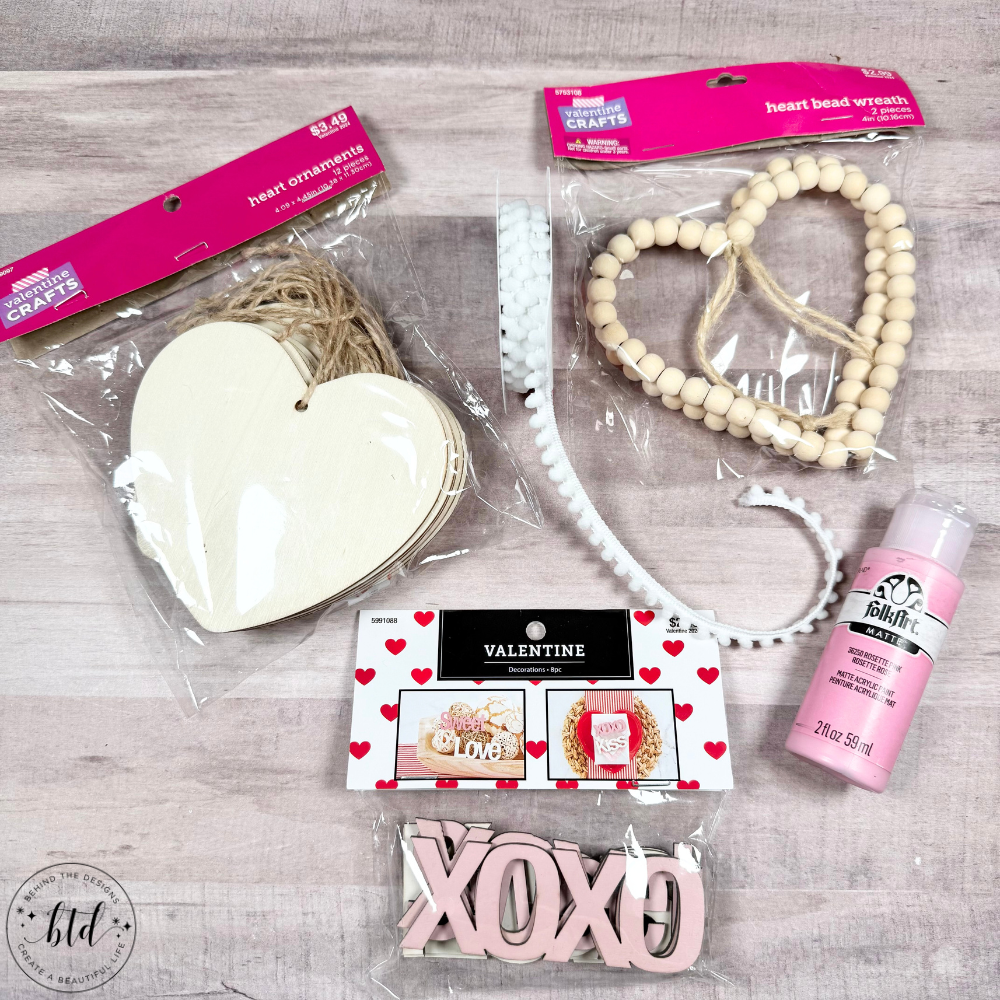
Supplies
- Wood Heart Ornaments (Hobby Lobby #5599097)
- Wood Heart Bead Wreath (Hobby Lobby #5753108)
- Wood Valentine Decorations Sentiments (Hobby Lobby #5991088)
- Folk Art Matte Acrylic Paints: Rosette Pink
- Paintbrush
- Hot Glue Gun
- 3/8″ White Pom-Pom Trim
- Cricut Permanent Vinyl, White
- Cricut Design Space Fonts: (1) Milasian Crica and (2) Americana
- Cricut Explore – Cricut Joy – Cricut Joy Xtra
- Cricut Cutting Mat
- Cricut Transfer Tape
Be sure to check out my Amazon Storefront for some or all of the supplies used in this project and more.
DIY Valentine’s Day Wood Hearts
Don’t you just love when a craft will function for more than just one thing? Take for instance these DIY Valentine’s Day Wood Hearts Cricut project. They are great for adding to your walls as home decor but they’d also work great as gift box toppers (kind of like a gift tag)!
1
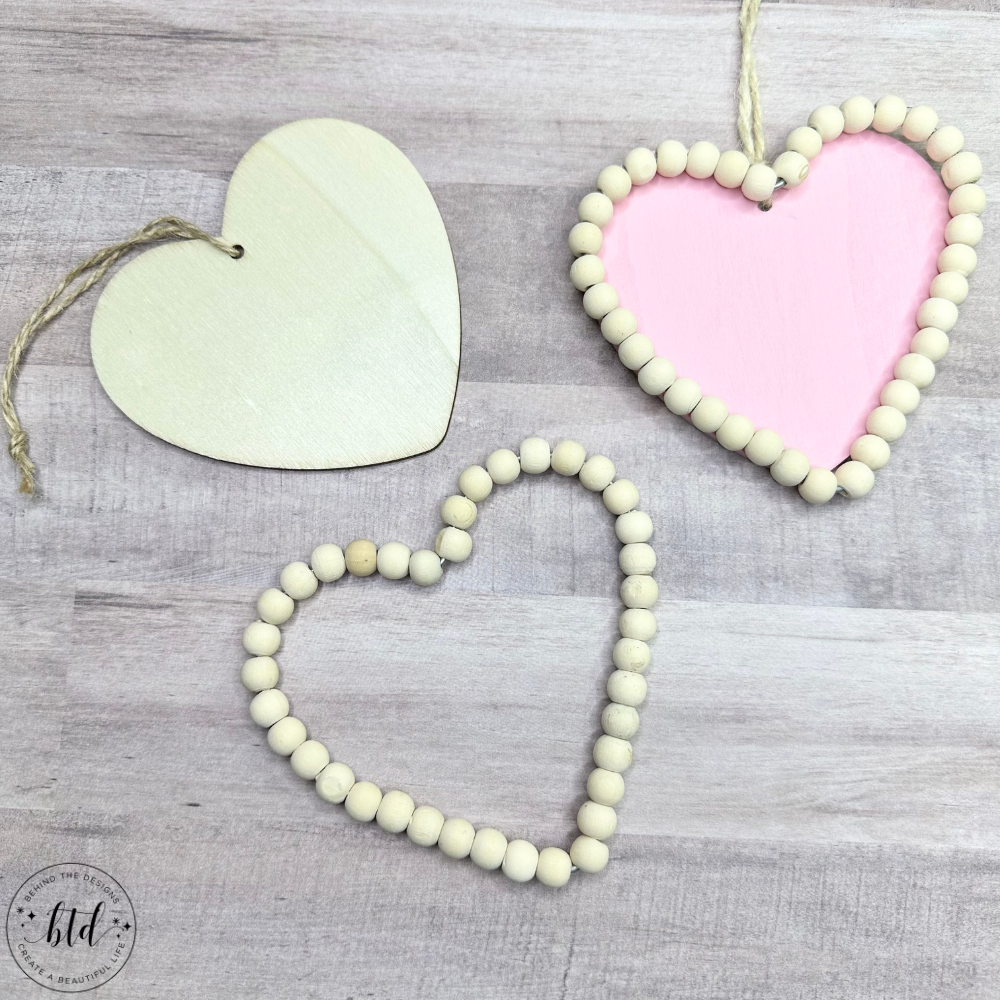
Paint Wood Hearts
Paint the wood heart ornaments with the rosette pink acrylic paint using a foam brush. Let dry completely and then apply a second coat for the best coverage.
There was one less step needed in this craft simply by using the Valentine sentiments that I purchased. That’s because they already came painted a muted shade of pink and the color paired quite well with the rosette pink that I chose for the wood heart.
Optional
During this stage of the project you can choose to add a more decorative ribbon hanger or leave the twine hanger as is. You want to decide that now because once you glue the wood heart bead frame down, you won’t be able to get ribbon to pass through the ornament hole.
2
Adhere Bead Wreath
This step is pretty straightforward, unless you wanted to paint the wood beads. Which is absolutely an option! For this step, use a hot glue gun to adhere the heart bead wreath to the heart ornament.
Since it’s a somewhat wide space to cover with glue, you might glue the heart bead wreath on in steps. This means you’ll have to glue it on from the side and at a quick-ish pace. That is so the hot glue doesn’t cool before you get more applied.
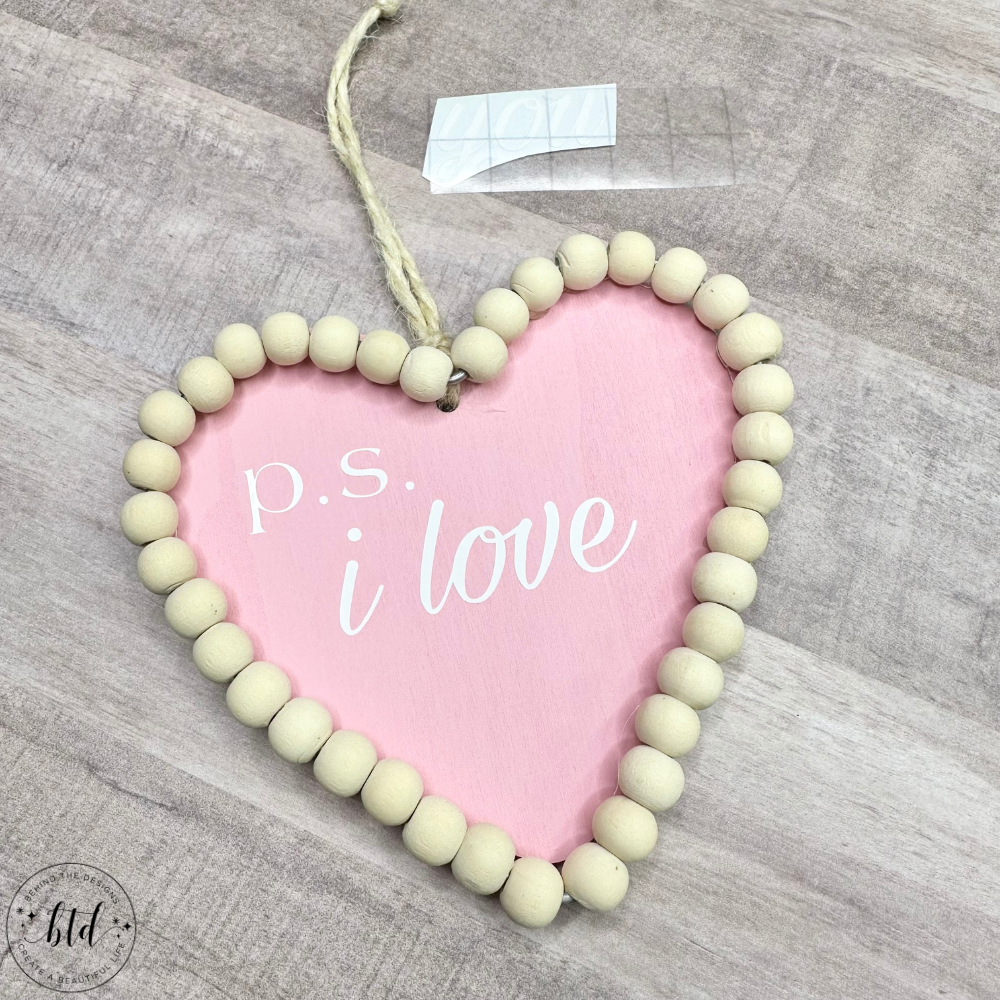
3
Adhere Cricut Vinyl
To me these wood heart decor pieces feel like those Valentine’s Day conversation candies. That’s why I decided to cut Cricut permanent vinyl in sweet sentiments! Once the wording was positioned to where I wanted it, I applied using my regular transfer tape.
Remember…although the vinyl is permanent, if you used permanent transfer tape it would pull up the paint and some wood. You don’t want that to happen to your project at this point because we are nearly done.
4
Glue On Pom-Pom Trim
Add the 3/8″ white pom-pom trim around the inside of the wood heart bead frame with hot glue. You can add this trim to both hearts or just one (like I did).

5
Adhere Valentine Sentiment
The last step is to use hot glue to attach the ‘sweet’ wood Valentine sentiment to one of the wood hearts. Again, since the wood word sentiment that I used was already painted, there was nothing to do in this step but to glue it down.
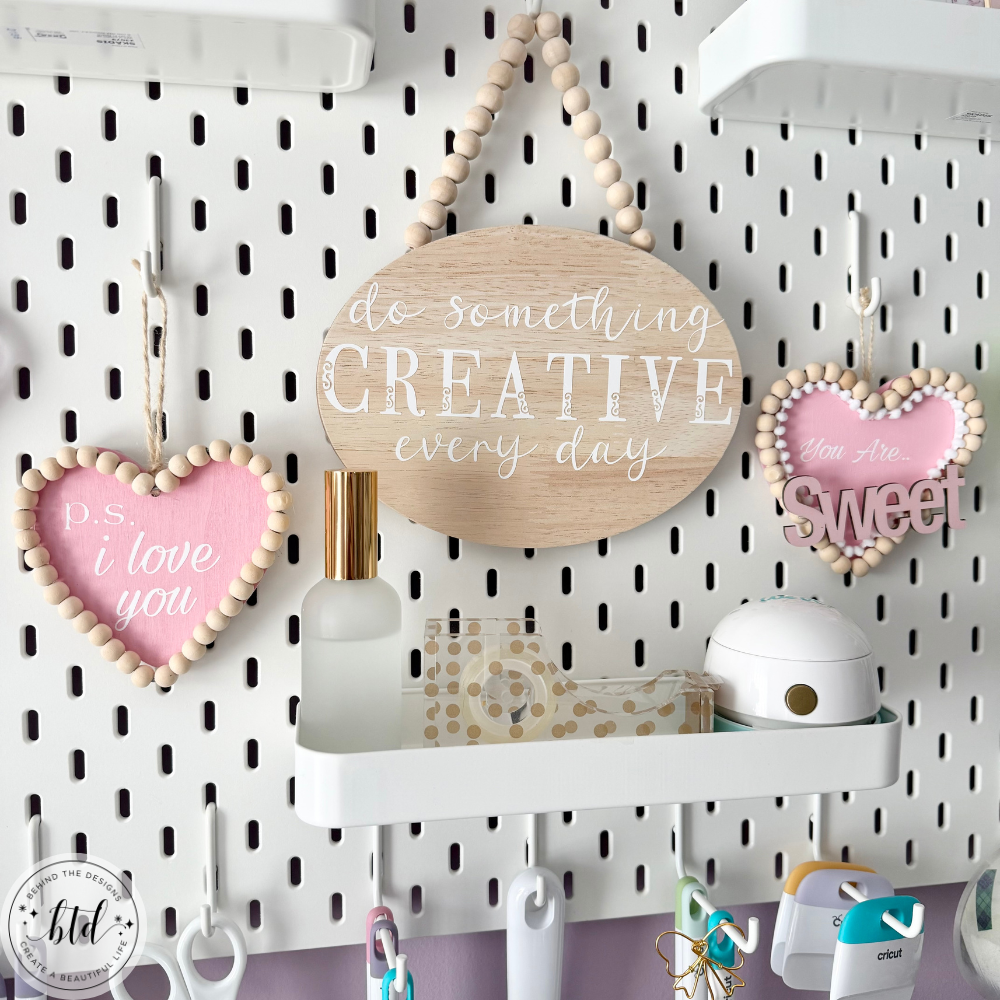
That’s it! Now you are ready to use your DIY Valentine’s Day Wood Heart Decor anywhere in your home!
These lovely Valentine’s Day Wood Heart Decor pieces look great in my craft room. Wouldn’t you agree?! Plus they paired perfectly with the DIY Filled With Love Valentine’s Day Sign Using Cricut.
Would you have created this project differently? I’d love to hear your ideas! Drop me a comment below.
Were You Inspired To Create A Valentine’s Day Craft?
Mention us @behindthedesigns or tag us using #btdinspired so we can see your creations! You can also leave a comment below!


Want to always be in the know? Be sure to subscribe to the newsletter to receive emails of all the latest blog posts and get the first scoop about any digital printables and freebies.
Join me on Instagram, Pinterest, Facebook and the Creative Planning Expressions Community to see what I’m up to as I Create a Beautiful LifeTM!


