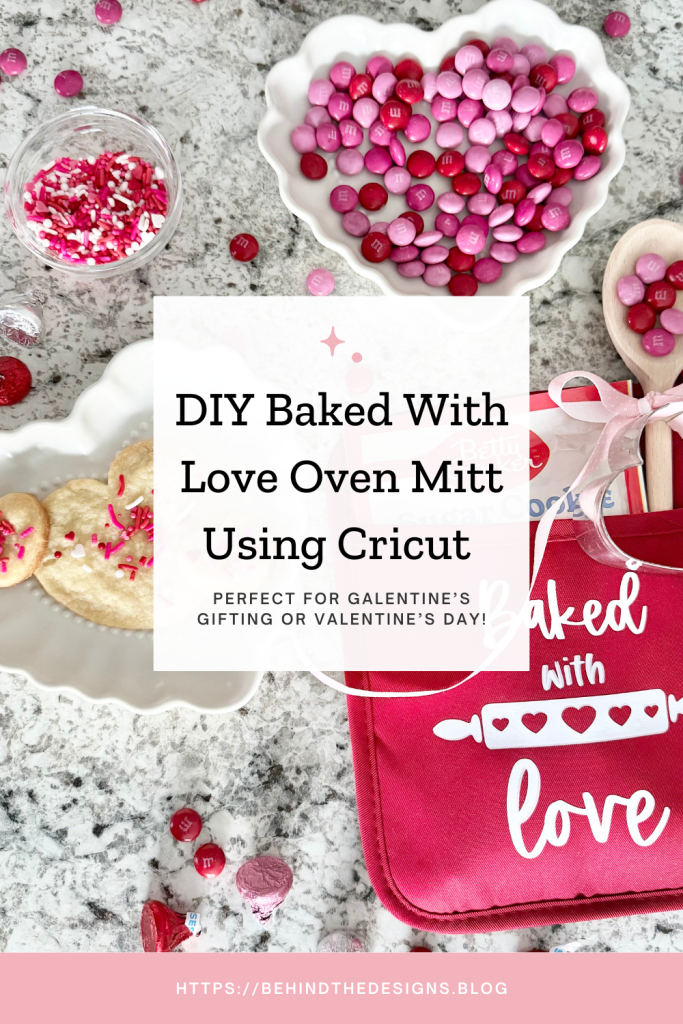
Do you love to bake cookies? Do you celebrate Galentine’s with your friends? Then this adorably tasty DIY Valentine’s Bake With Love Oven Mitt gift idea is perfect for you! In 15-minutes or less you too can easily create this Valentine Dollar Tree Oven Mitt!
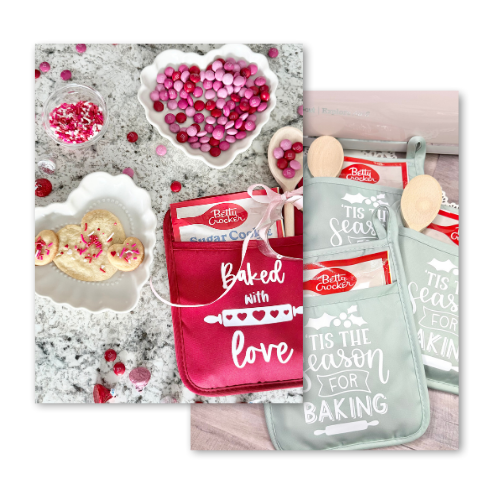
I’ve got to admit I’m a little obsessed with creating these DIY oven mitts from the Dollar Tree! You might remember the Personalized Pot Holders Gift Idea with Cricut I created as Christmas gifts. But these Cricut oven mitt projects also make great gift ideas for those special Galentine’s celebrations and friends!
The best part is you can fill them with any dessert baking packet you’d like. In fact, I also found the cookie and brownie baking packets from Dollar Tree fit perfectly inside these oven mitts. All you have to do is cut, weed and iron-on your Cricut vinyl!
don’t miss out!
Get More Valentine’s Day Craft Ideas, Freebies and Special Offers Straight To Your inbox!
You can gift these DIY oven mitts after you’ve created them or you could also nestle them into a gift bag or basket. You’ve no doubt heard of the Boo Baskets or Burr Baskets? Well what better addition to them than a cozy, feel good baking packet?!
But these oven mitts aren’t just for gifting! I’ve also used these DIY oven mitts as decorative elements in my kitchen for a bit of holiday cheer. The pop of red against my neutral farmhouse kitchen decor looks amazing!
Supplies
- Oven Mitt 6.75″ x 8.5″ (Dollar Tree)
- Cricut Design Space (#M4B2399OA)
- Cricut Iron-On Vinyl, White
- Siser Easyweed HTV, Light Pink
- Cricut Explore – Cricut Joy – Cricut Joy Xtra
- Cricut Cutting Mat
- Cricut EasyPress
- Cricut EasyPress Mat
- 8″ Wood Spoon or Wire Whisk
- Sweet Goodies (cookie mix, cake mix or something similar)
Be sure to check out my Amazon Storefront for some or all of the supplies used in this project and more.
DIY Valentine’s Pot Holder idea
This whole project takes no more than 15-minutes to create. It also gives you the option to layer your Cricut vinyl or not. Then to finish it off you can add fun baking accessories like a wire whisk or a wooden spoon. Below are some tips for creating your own DIY Valentine Baked With Love Oven Mitt using Cricut.
1
Cricut Design Space
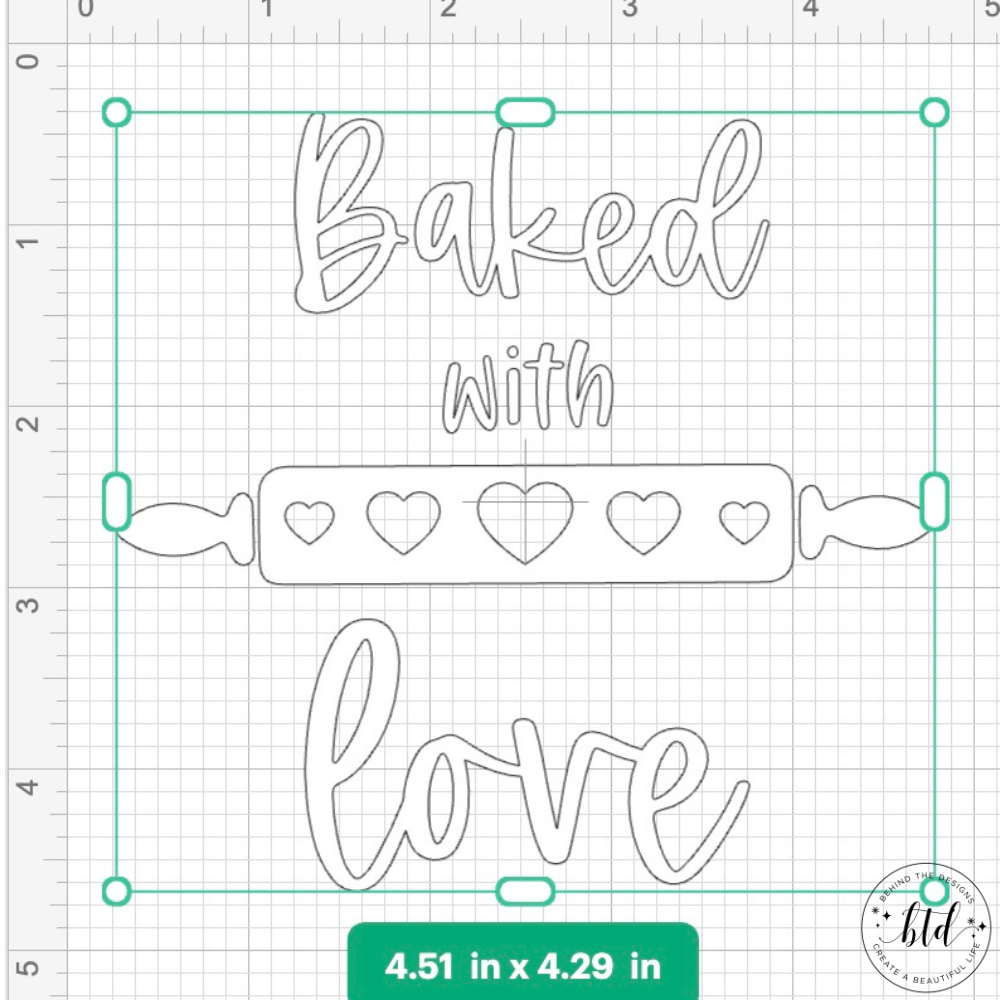
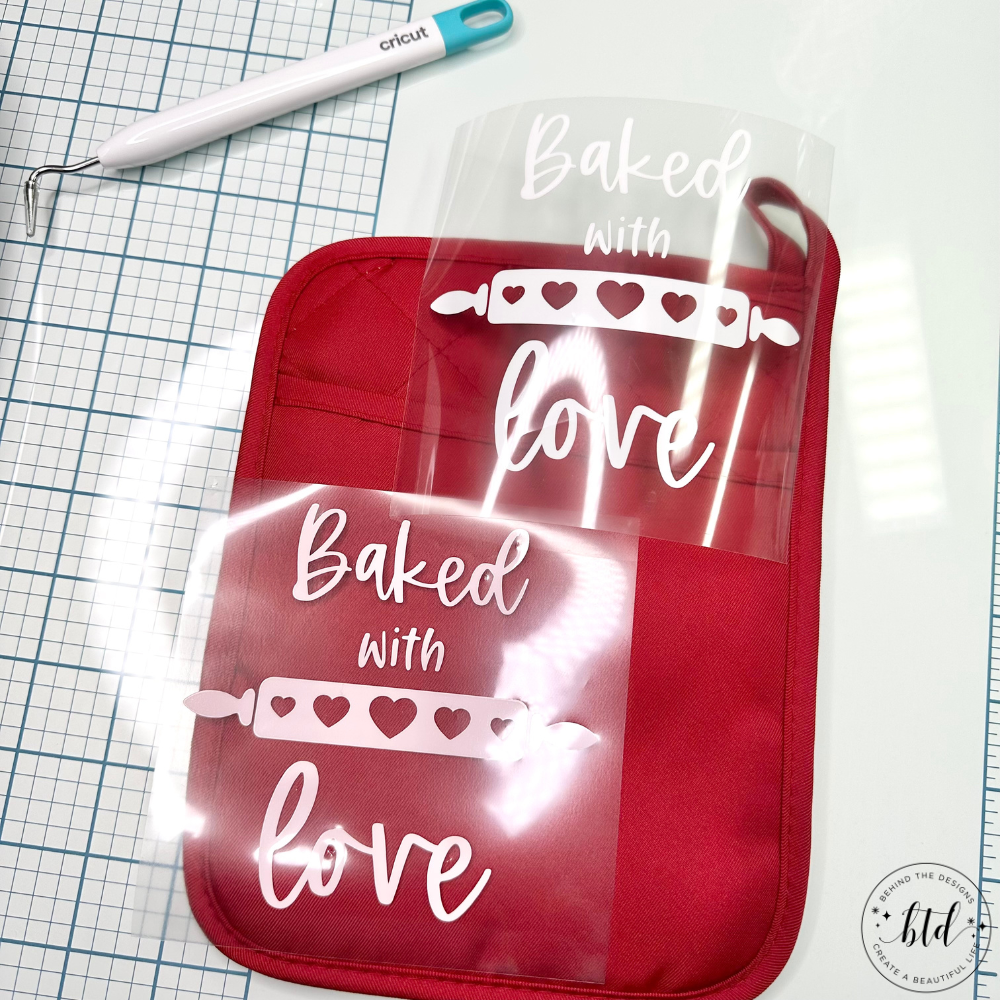
The first step is to choose your Valentine image in Cricut Design Space. But be forewarned, there are many great images to choose from! Shown above is the design I chose for my oven mitt; as well as the size that I cut the vinyl.
Next you need to decide if you want to layer your design. If you do want to layer, simply copy the original design so the measurements are the same. You do this because when you add a layer you are simply creating an image shadow, of sorts.
2
Cut & Weed Vinyl
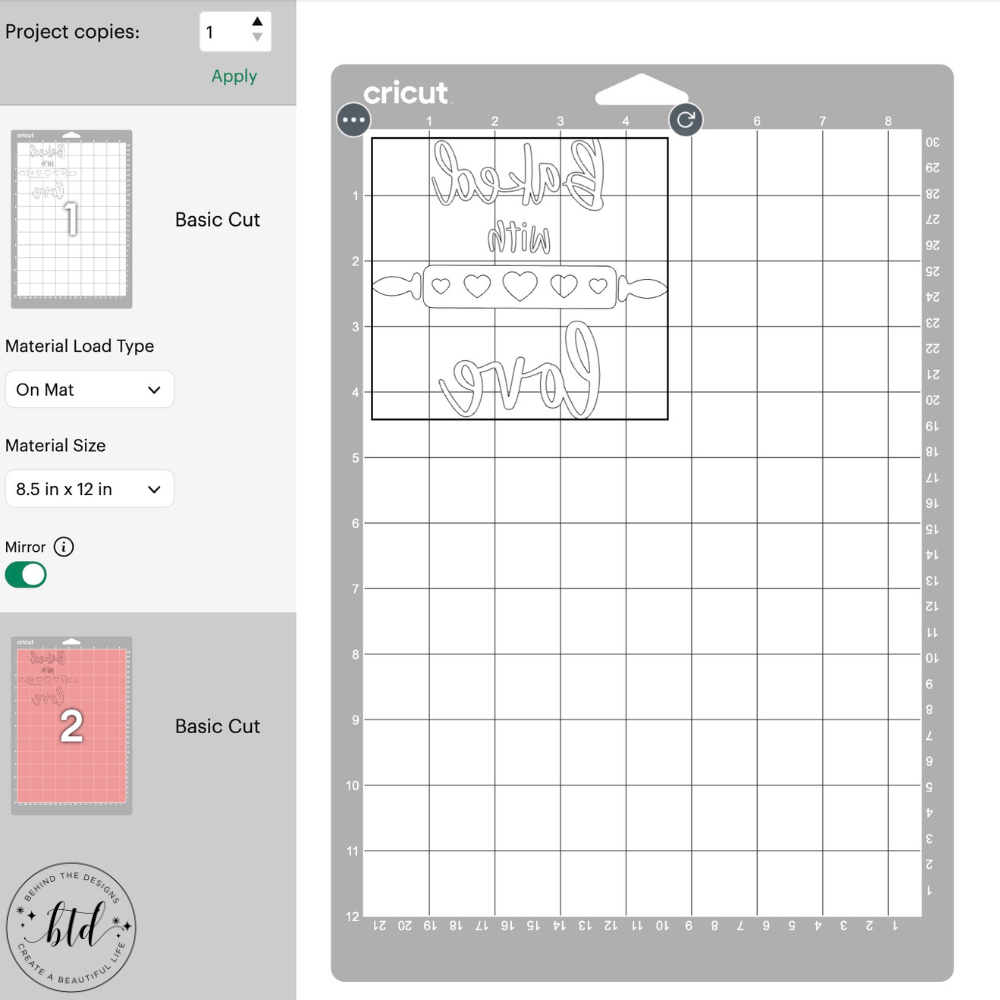
Once your design is all set (size, color, layout, etc.) you will have to decide if you want to cut your vinyl colors separately or on the same mat. You can absolutely do either one. If you prefer to see your cuts in the color vinyl that you created them, then you will end up cutting on separate mats (as shown above).
Before cutting, remember to select the “mirror” option for your project.

If you want to cut on the same mat (meaning, one cut process) all you have to do is make sure both vinyl colors are set to be the same. For example, shown above is my two-color project showing as one cut process in white vinyl.
All I have to do on my mat is add each color vinyl in the correct size and orientation as shown above (vertically). The Cricut machine doesn’t distinguish color when it cuts. You can add as many cuts and vinyl colors as you want on your mat…as long as they are placed on the mat in the same space as in the cut setup.
Remember to place your iron-on vinyl onto the mat, shiny side down.
The project will be cut backwards. But once you flip that vinyl over to iron it on (now shiny side is up), it will be correct.
3
Cricut Layering Tips
To layer (the vinyl)…or not to layer…that is the question. To that I say, it’s your Cricut project and you can do either! For my project I chose to layer white vinyl over a light pink vinyl.
Here’s What I Learned
- For the ‘shadow’ color, use a color vinyl that is at least two shades darker (or lighter) than the top color.
After I finished my project I realized I probably should’ve gone with a darker pink vinyl for better shading. Plus I could’ve also given it a wider contrast by setting the pink vinyl a little more offset from the white vinyl.
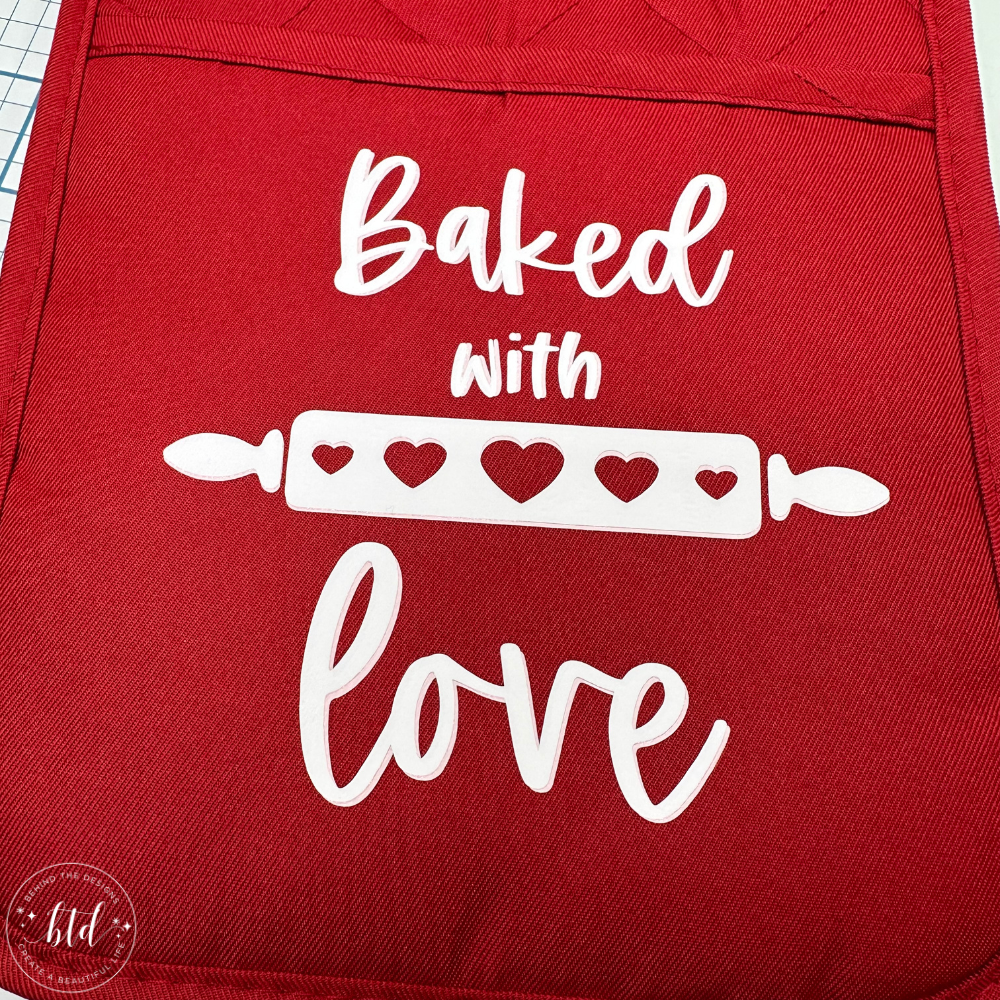
You can clearly see from the image above the pink vinyl shadow layer is barely visible. This Valentine Baked With Love Oven Mitt still came out beautifully, even with the not so great shadow color!
4
Iron-On Tips
When using iron-on vinyl in a layered project, there are definitely some tips I can offer you.
- Apply the first layer (pink) with your iron of choice for approximately 5-10 seconds at 315°F. This time may vary depending on what iron you are using. All you need the first layer to do is slightly adhere or be able to easily pull away from the plastic carrier sheet (or tacky liner).
- Apply your second layer (white) and place it slightly offset from the first layer (pink). This creates that pink ‘shadow’ effect. Place a sheet of parchment paper on top and press firmly for 25-30 seconds.
If you are looking for more iron-on tips, just search our website for ‘iron-on tips’ to help with your creative project.
5
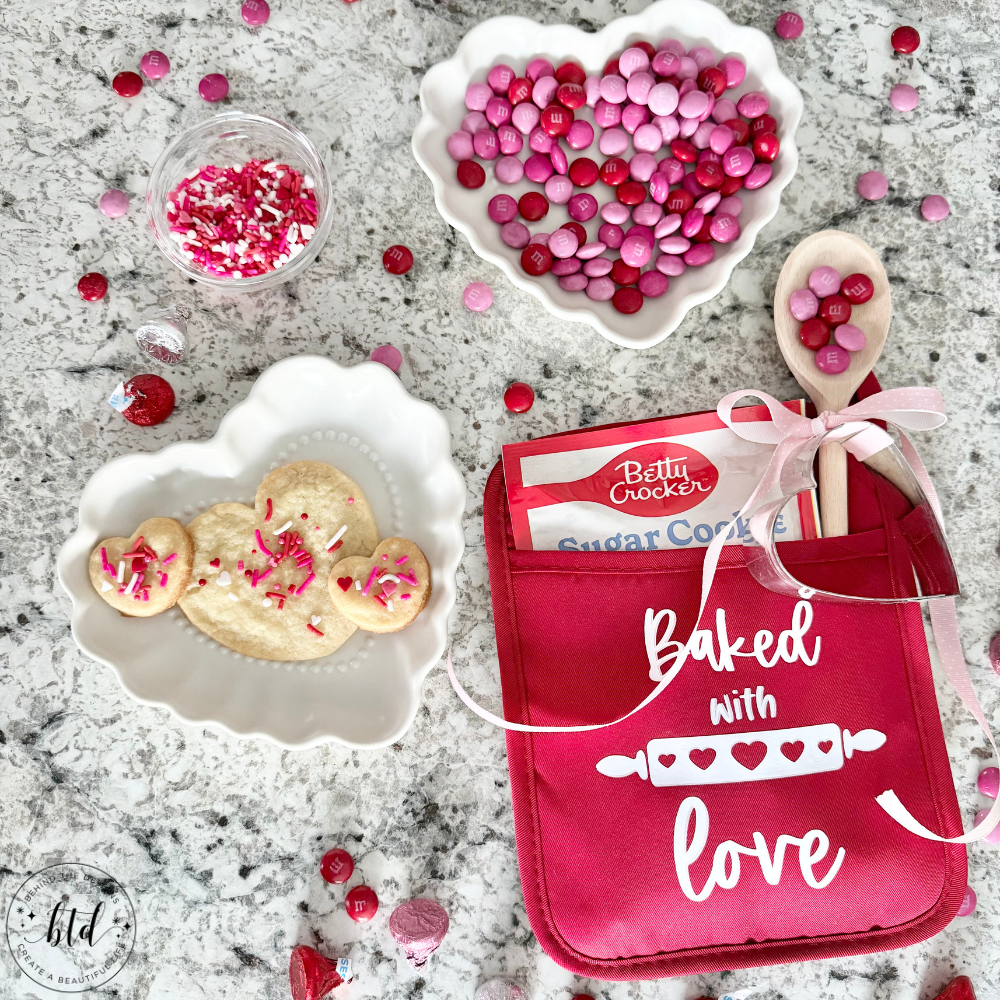
Fill with Goodies
When I picked up these oven mitts I also picked up the sugar cookie mix packet. I found that the Betty Crocker sugar cookie mix package that you get anywhere else was too big for this oven mitt.
Of course, you don’t have to fill it with a baking mix. You can use a decorative clear treat bag for already pre-made cookies that you’ve baked.
To finish your Cricut project off, add in a wooden spoon or wire whisk and attach a cookie cutter to it with a decorative ribbon. Now it’s ready for gift giving!
Of course I just had to make some extra heart-shaped sugar cookies for my sweet husband! Don’t they look adorable on the ruffled cream heart-shaped dessert plate?! My daughter found these for me at Aldi’s and I absolutely love them!
The only note I’d make about this DIY Cricut project is that I would caution the gift recipient to not actually place hot pans on the vinyl side. Doing so will likely melt the vinyl.
Were You Inspired To Create A Cricut Pot Holder?
Mention us @behindthedesigns or tag us using #btdinspired so we can see your creations! You can also leave a comment below!

Want to always be in the know? Be sure to subscribe to the newsletter to receive emails of all the latest blog posts and get the first scoop about any digital printables and freebies.
Join me on Instagram, Pinterest, Facebook and the Creative Planning Expressions Community to see what I’m up to as I Create a Beautiful LifeTM!