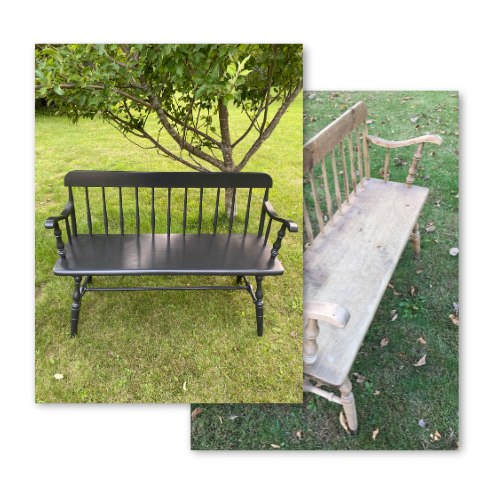
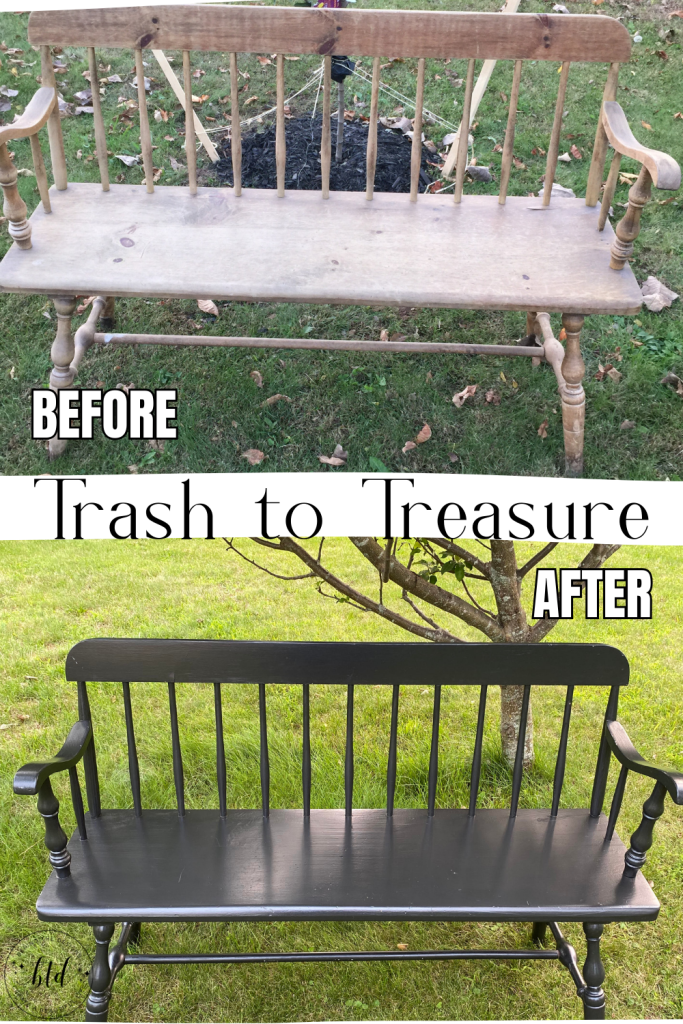
DIY Trash To Treasure Sitting Bench Makeover
Easily take a discarded piece of furniture from trash to an heirloom treasure with paint! This DIY Sitting Bench was so easy to complete and now has a permanent place in our home. In this post I share the 3 simple steps that took this bench to a whole new level!

What is it about furniture makeovers that just make us DIY’ers swoon?! Maybe it’s the repurposing of something that was once forgotten about, almost like reviving it’s history. I’d be lying if I didn’t admit to loving a good DIY furniture makeover project.
My How to Refinish and Reupholster a Wood Chair and DIY Vintage Heirloom White Desk Makeover is a testament to how much I love to work on furniture projects. But what is even more satisfying is seeing the before and after pictures…am I right?!
don’t miss out!
Get more furniture makeover project ideas plus tips and tutorials!
What made this particular sitting bench project even more exciting was the face that it was free. Yes, free. We found this bench at the curb or as my father-in-law says, “dangerously close to the road” (which is code for put it in the truck!). This sitting bench was also the one featured in The Benefits of Planting Fruit Bearing Trees garden post.
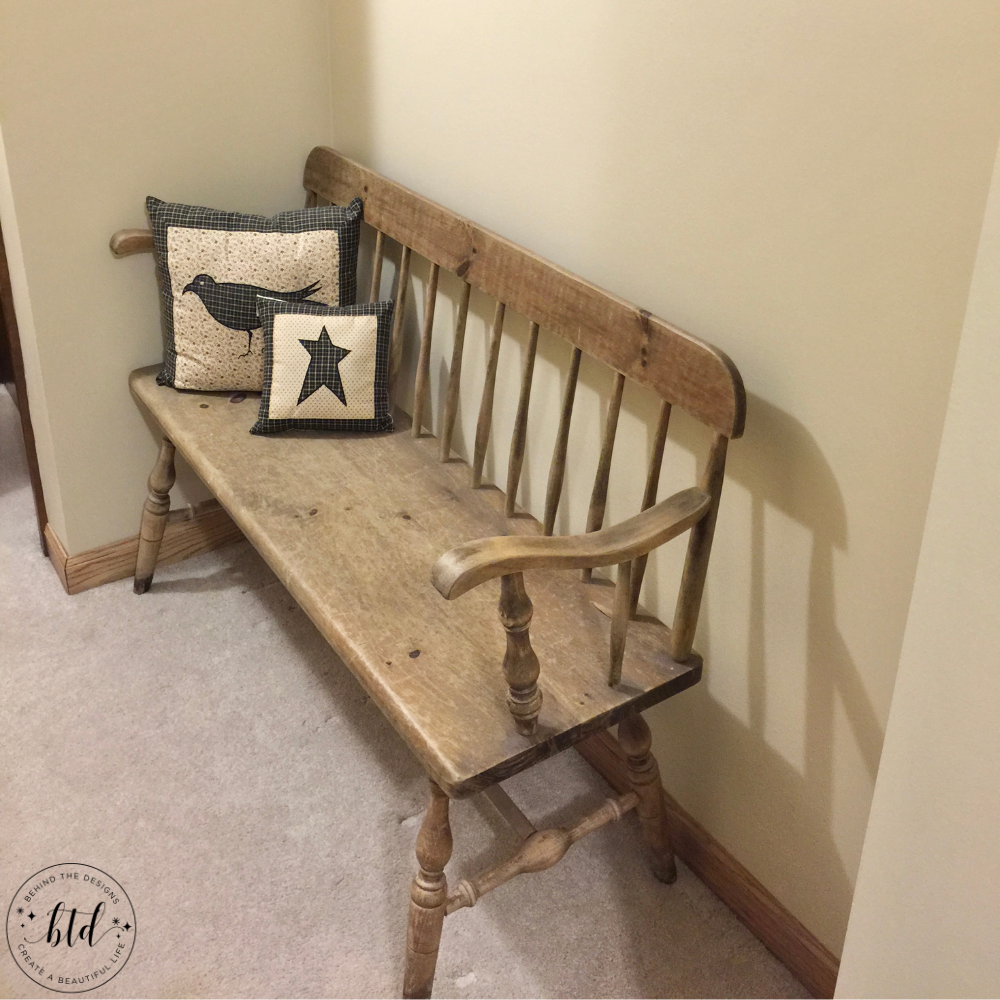
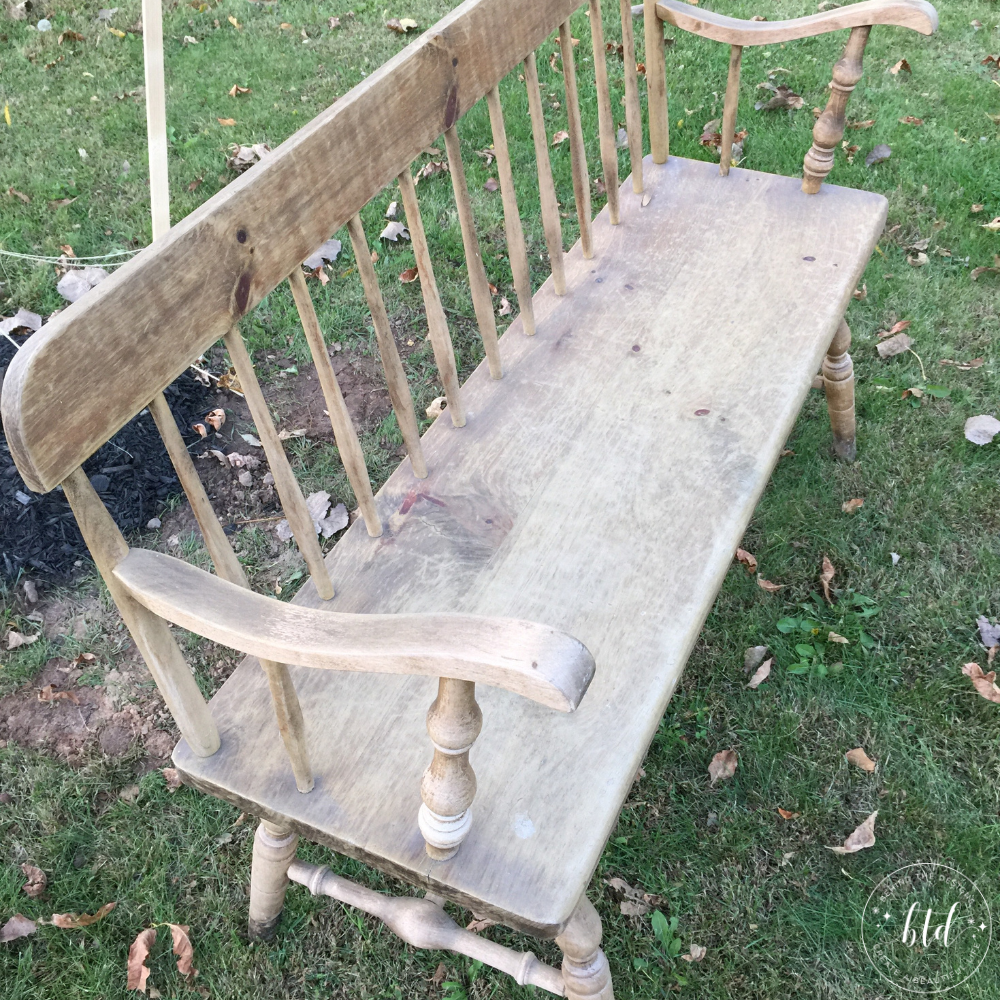
When we first found the bench I just cleaned it up and put it in our upstairs hallway. On its’ own it really had a good stain color to it, but I still wanted to give it a makeover.
Supplies
- Behr Premium Plus Deep Base, satin finish paint in Black Suede
- Paint brush
- Foam roller
- Paint Tray
- Hand sander
While I don’t know the history of this bench, it must’ve sat in water for a period of time because the bottoms of all four legs had water damage and some deterioration of the wood. But all that is fixable with a little TLC. So let’s get started.
DIY Sitting Bench Makeover
Every project has its’ time. While this may have sat in our hallway for years, the end result was worth it. An added bonus to this DIY furniture makeover was that I was able to shop my own paint stash! That’s a win-win in my book.
1
Clean the Bench
To start using this sitting bench all I had to do was wipe the bench down with a damp cloth. I cleaned it this way because it was sitting at the road for some period of time.
You can see the water damage I spoke about where there is dark discoloration on the bottom of the legs. But those imperfections don’t bother me because they all tell a story. Although it would just be nice to know its’ history. I wasn’t a big fan of history when I was in school but now it just fascinates me…in furniture at least.
This picture was also taken when I was into my primitive decorating style. That was some years back. I’ve since “gone to the light” as a friend once said to me.
2
Prep the Surface
To prep the bench for paint my husband used some wood filler on the legs that had deterioration from water damage. Then he used a palm sander for the flat surfaces and hand sanded the detailed areas.
In hindsight, after it was all sanded down I should’ve just lathered it up with some clear polyurethane because the natural color was actually really nice. But, I was drawn to painting it a black color because I do still have black accents all around our house. If I should I change my mind, well, I (i.e., my husband) can just sand it down again!
If you are prepping a furniture surface for paint and sanding isn’t working too well, try TSP cleaner. Then do any further sanding that might be necessary.
3
Paint Your Fav Color
This is my favorite part of any DIY furniture project. It’s like when you’re all dressed up your outfit isn’t complete until you put your jewelry on; jewelry is the finishing touch that makes any outfit shine. It’s the same when painting furniture; this part of the process truly shows the beauty of each piece.
Since this sitting bench was pretty dry, it took two good coats of paint to fully cover it. The best part of this paint was that I didn’t need to use a top coat. It goes on like butter and has a great finish to it; which is why I’ve used it in numerous places throughout my house. All our exterior doors are painted the same black color.
Although I used a different color of black paint the DIY Curio Cabinet Makeover pairs pretty nicely with this DIY sitting bench!
What I really love about this bench was that it was the perfect size to easily use any where the house. It sat in our upstairs hallway for a number of years. It has also been in our living room, dining room and entryway. This sitting bench was perfect to use for guests to be able to sit and put their shoes on or take off. But, if we have a lot of guests over, I could easily pull this bench over to our table and use it as a table bench too.
I absolutely love the finished look of this sitting bench! Don’t you?!
Were you inspired to diy a furniture piece?
Mention us @behindthedesigns or tag us using #btdinspired so we can see your creations! You can also leave a comment below!


Want to always be in the know? Be sure to subscribe to the newsletter to receive emails of the latest blog posts and get the first scoop about any digital printables and freebies.
Join me on Instagram, Pinterest, Facebook and the Creative Planning Expressions Community to see what I’m up to as I Create a Beautiful LifeTM!