Journaling and memory keeping about ourselves is hard! Use my paper napkin decoupage idea to setup a journal spread of your own. These journal pages are easy to create and offer a beautiful twist to the typical autumnal colors. Plus you’ll get lots of tips and inspiration for your project!
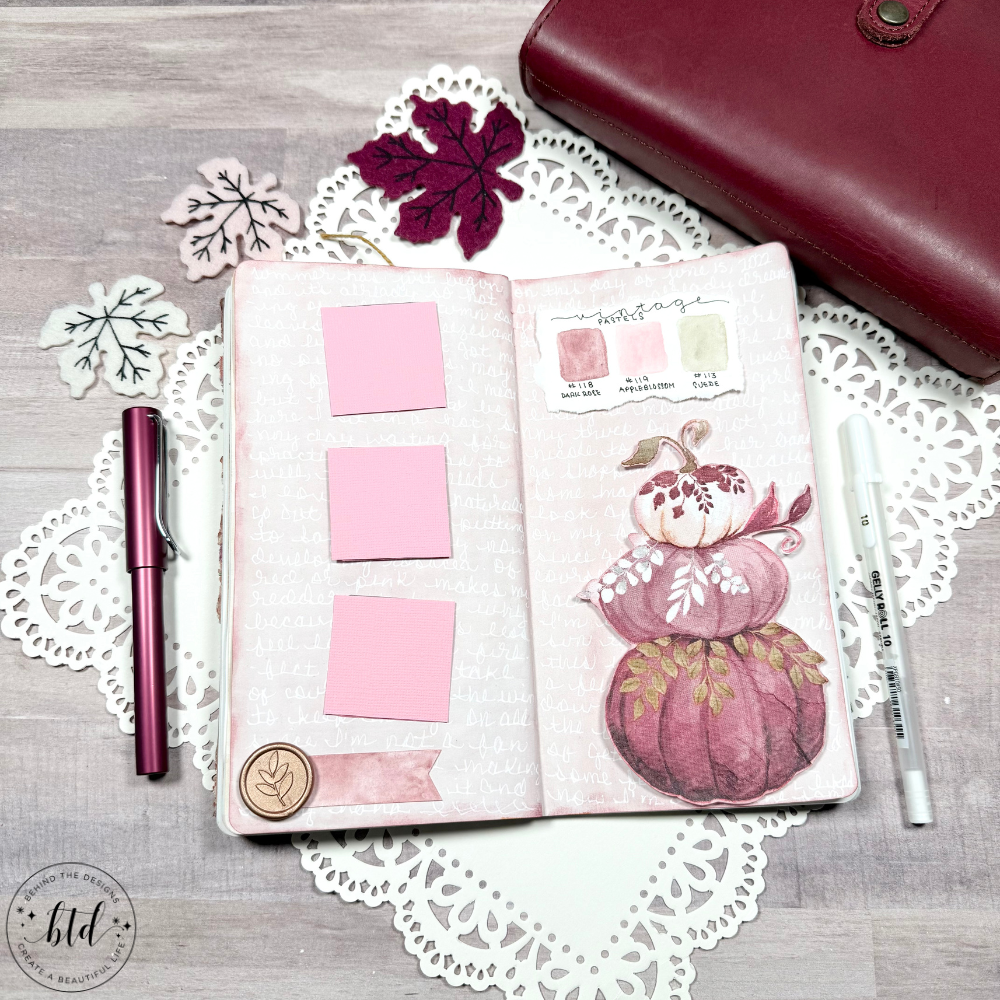
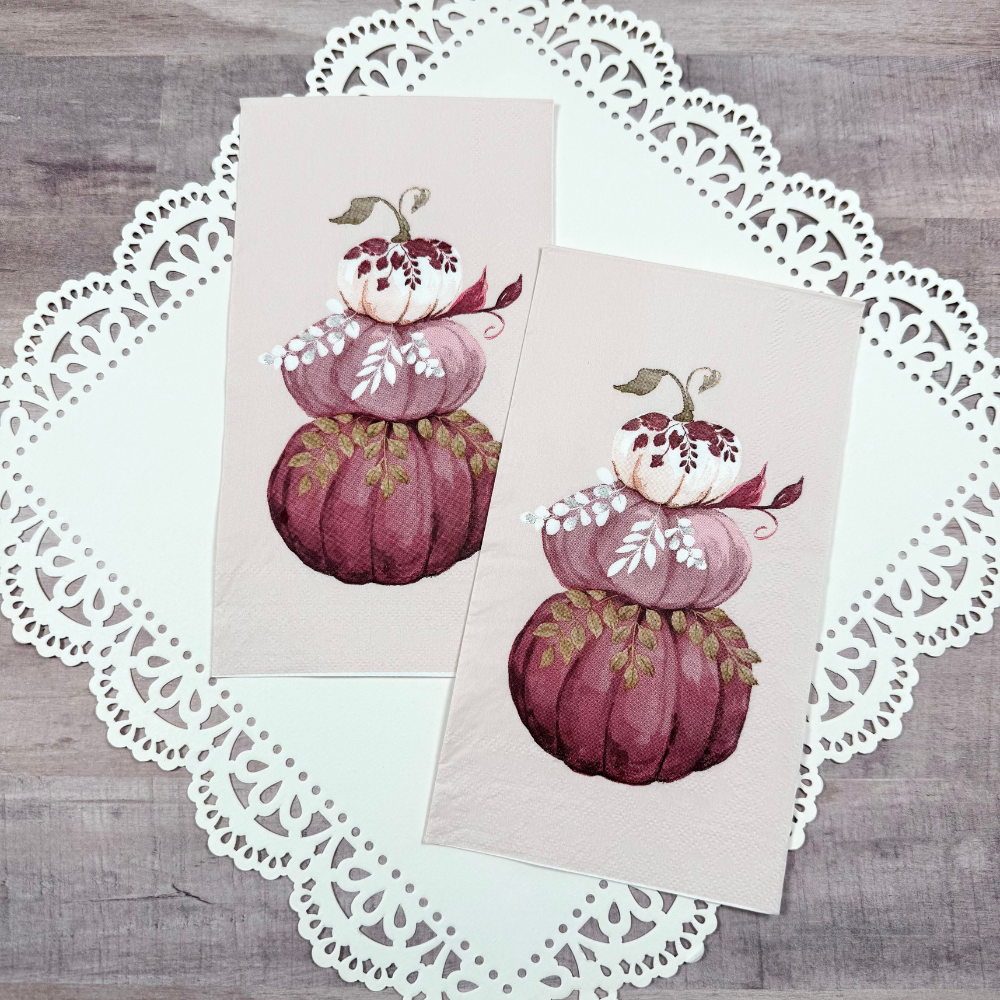
The inspiration for this journaling spread came from the burgundy and pink stacked pumpkins decoupage napkin. I fell in love with the twist on the tradition red, orange, gold and brown autumn colors. The burgundy, rose and pink colors in the stacked pumpkins worked perfectly to complete this journal page.
For this project I decided to use a few selfie photos I had taken some years back. In them I was wearing a pink shirt that fit this theme.

don’t miss out!
Sign up for more Inspiring Art Journal Pages and Journaling Techniques!
That’s the beauty of creating journal pages. They tend to develop piece by piece, element by element. Any other way and you’re likely forcing a journal spread to come to life. You want your journal pages to be natural…organic…personal. Building them piece by piece always results in a beautifully finished page(s).
I know that these journals will become cherished heirlooms for my daughter. It’s important to keep them for her.
As moms’ we tend to forget about ourselves. I don’t think twice about journaling memories of things I see or places I’ve been. Rarely do I put my photo into the journaled pages.

The supplies above are not necessarily all the supplies for this project. Even with the few additional elements this spread was super, duper, easy to make!
My favorite place to write and create is in my journals by Planner Perfect. These journals come with quality paper that hold up to pretty much most mediums. They are even superb for just plain journaling without all the frills.
Supplies
- Planner Perfect Journal
- Burgundy & Pink Stacked Pumpkins Napkins
- Prima Vintage Pastels Watercolor
- Mixed Media Art Paper
- Liquitex Matte Medium
- Flat Head Art Brush
- Tim Holtz Distress Ink Aged Mahogany
- Fingertip Sponge Dabber
- Friskars Fingertip Swivel Knife
- Gellyroll White Pen #10
- Micron 01 Black Pen
- Leaf Wax Seal
Additional supplies needed to recreate this journal spread can all be found in my Amazon Storefront.

Burgundy & Pink Stacked Pumpkins
One of the easiest ways to pull together a journaling spread is by using paper napkins and decoupage.
You can also find loads of journaling inspiration to help you get started on your own journal creations.
Setting up journaling pages shouldn’t be difficult; keep your pages simple and add pops of color and seasonal touches.
Stacked Pumpkins Napkin Journal Spread
Below are the step by step instructions for creating this beautiful journal spread.

1
Separate Paper Napkin Layers
The first step is probably one of the more important steps because it forms the foundation for your inspired decoupage napkin journal page.
This decoupage paper napkin is 3-ply which means it has three layers of paper.
- 1st layer – This is the image which is the top layer.
- 2nd layer – This layer is on a white backing and usually reflects a faint mirror image of the printed layer.
- 3rd layer – This is just plain white paper backing. It’s the first layer that easily pulls apart from the other two layers.
Can you see that faint shadowing of the image? This is how you know you’ve successfully pulled off the 2nd layer.
The key to successfully separating the first and second layer of the napkin is to use two pieces of tape. Place the sticky side against each layer and it should easily pull apart.
Once you have successfully separated your napkin you are now ready to decoupage! Normally I decoupage a paper napkin right to the journal page. For this project I created a decoupage die cut.

The steps are the same except you’ll be decoupaging onto a lightweight card stock. Once it’s dry you can fussy cut around the image. You might want to pull out a fingertip swivel knife to cut around the leaves at the top.
The next step is getting your journal page(s) ready to be worked with. To do this grab some watercolor or acrylic paint and do test swatches to get the color you like.

2
Watercolor Background
To get as close to the pink background color of the napkin I used a combination of three colors. I chose to use watercolor and just made adjustments to get the desired shade of pink.
Give your watercolor journal page more emphasis and dimension. Use stamping ink to put a darker color all the way around the journal page edges.
Once the journal pages and stamping ink are dry it’s time to write! For this page I decided to use my white gellyroll pen to write on the watercolor pages. That way the pages would highlight the pictures and the stacked pumpkins decoupaged napkin die cut.

You can choose to just scribble a script lettering across your pages, write out a long poem or a letter to yourself. What truly makes this a memory journal page is how I journaled a memory across both pages. I wrote from left to right without separating the pages.
Now it’s time to assemble your journal page. This is the fun part!

3
Assemble Journal Pages
You always want to start your page by adding the largest element first. To attach the stacked pumpkins I used foam tape to raise it up off the page and give it a 3-D effect.
On the left side page I added in placeholders for the three photos I planned on adding, along with a leaf wax seal and watercolored tag at the bottom.

After getting the page setup I noticed the top right-side was a bit bare. An easy fix was using a paint color swatch card!

I pulled out my paints again and created a watercolor paint swatch card. I used the same foam tape to raise this off the page for a 3-D effect.
Congratulations for making it this far in the project! Check out some of the FAQ’s I received on this journal project.
You may also like…
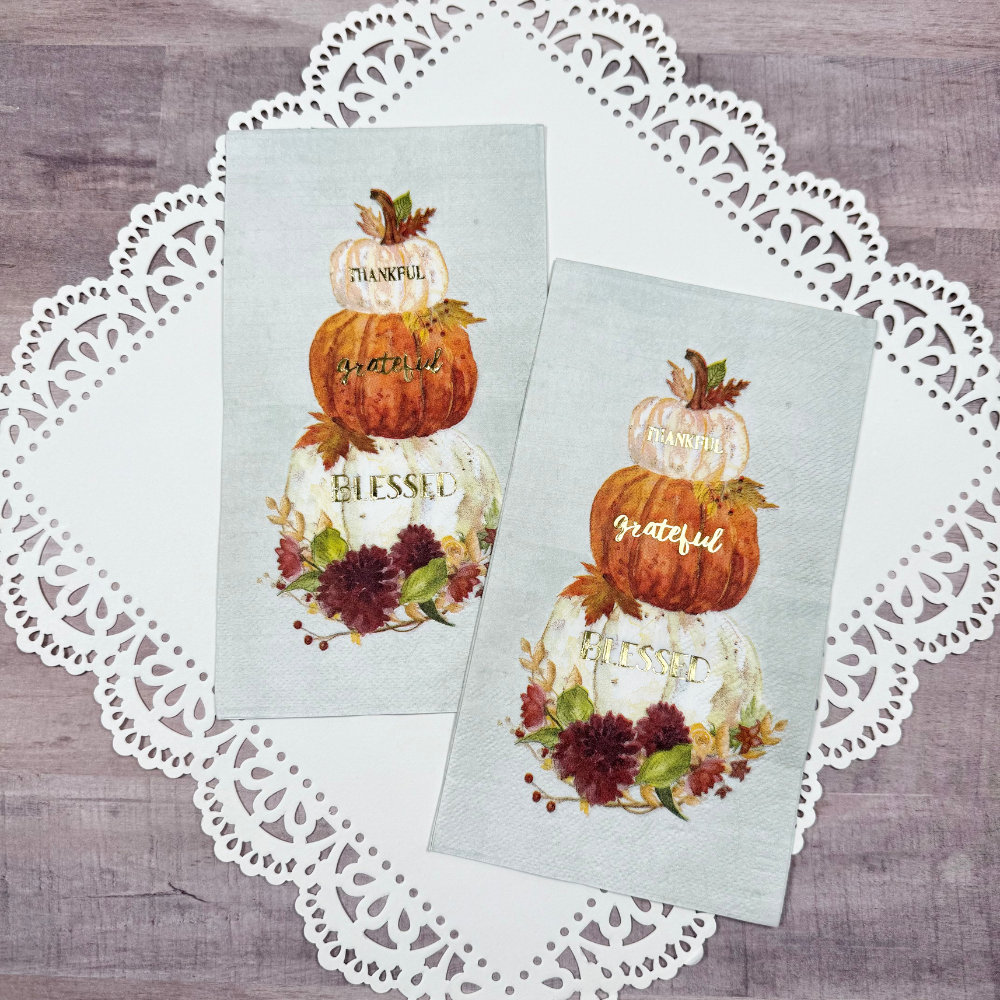
Thankful Grateful Blessed Stacked Pumpkins
The perfect shading for all your autumn journaling spreads.
Q & A on This Is Me Journal Spread
Q: Why would I want to make a spread about myself?
A: Why wouldn’t you want to? You should be represented in the memory books and journals your children will cherish for a lifetime! Don’t just make them…be IN them!
Q: I can’t write in a straight line! Can I put pencil lines on the watercolor page?
A: Yes. Just know that you have to use a light touch with the pencil and erase gently. Or just throw caution to the wind and…write!
Q: Can I move the die cut once I place it down?
A: Yes and no. The sooner you lift it the better. I used a foam tape and was able to successfully pull up and reposition. This will be a lot harder and messier the longer you wait to lift it.
If you loved this Napkin project, you’ll love these projects too:

Let Freedom Ring Art Journal Page Using Napkins

Thankful Art Journal Page Using Sunflower Napkin

A Dogs Love Pawprint Journal Page Using Napkins
Did you make this Stacked Pumpkins Journal Page?
Mention us @behindthedesigns or tag us using #btdinspired so we can see your creations! You can also leave a comment below!


Want to always be in the know? Be sure to subscribe to the newsletter to receive emails of all the latest blog posts and get the first scoop about any digital printables and freebies.
\Join me on Instagram, Pinterest, Facebook and the Creative Planning Expressions Community to see what I’m up to as I Create a Beautiful LifeTM!
