DIY Keepsake Wedding Anniversary Shadow Box
Give a 50th anniversary gift that will become a treasured keepsake for years to come! This is one of my favorite things to do! This DIY Keepsake Wedding Anniversary Shadow Box was easy to make and a perfect gift idea! Get the design details in this post.
Growing up I never understood the hype behind 50th wedding anniversary celebrations. Once I married I truly understood the celebration of that achievement. Marriage can be hard work; sometimes real hard work. Most of all marriage is very rewarding.
These days the likelihood of reaching 50 years of marriage is slim.
don’t miss out!
Get more Inspiring DIY Ideas for wedding and anniversary gifts by subscribing!
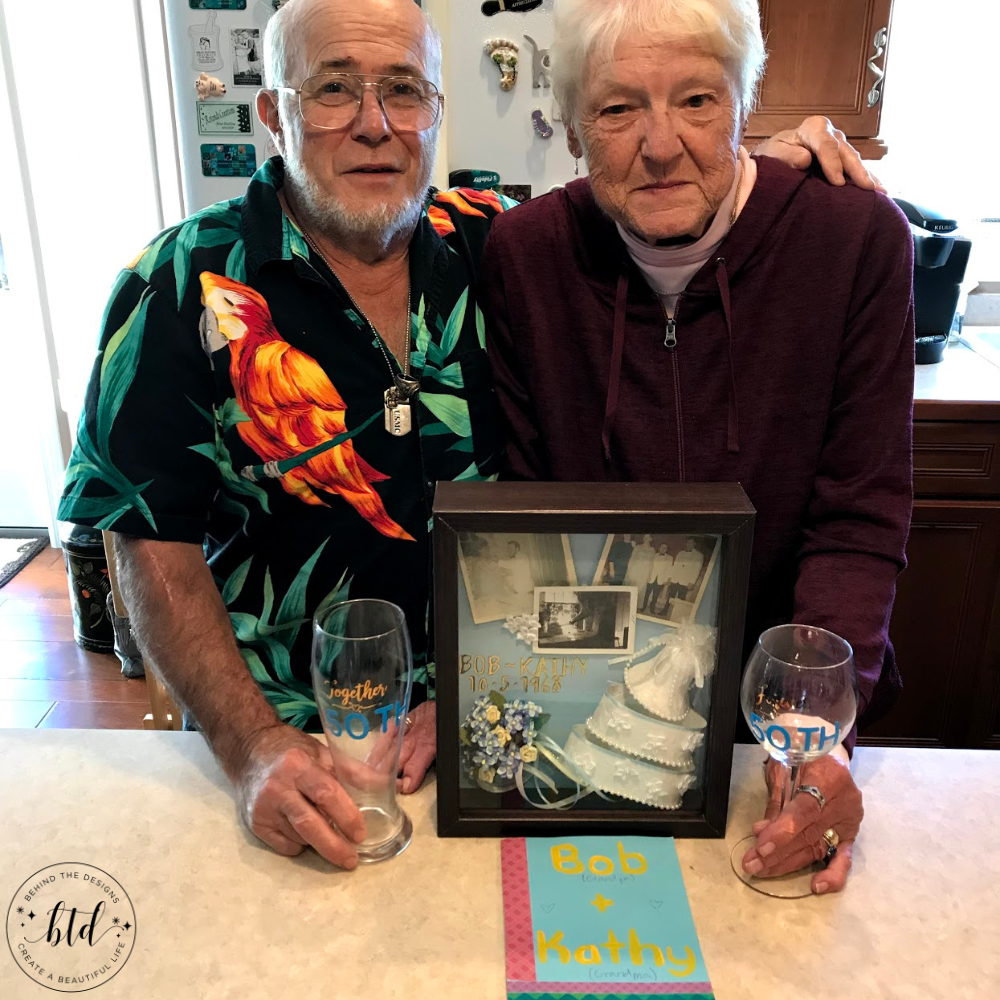
Today is my in-laws 53rd wedding anniversary. That made today the perfect day to share this easy craft that I created for the both of them. Sadly, we lost my mother-in-law in 2020.
This is not my first DIY Keepsake Wedding Anniversary Shadow Box. I’ve been giving framed wedding invitations as gifts for years and years. They are unique, personalized gifts to give.
My sisters-in-law asked me to create something similar for their parents many years ago. The timing of not having created this years ago worked perfectly. Now it was a great gift to give on their parents’ 50th anniversary celebration.
Details To Consider
- Wedding invitation
- Wedding pictures
- Wedding colors
- Wedding theme (simple, elegant, rustic, etc.)
- Type of favors given
- Seasonal elements
- Wedding cake
- Brides dress material
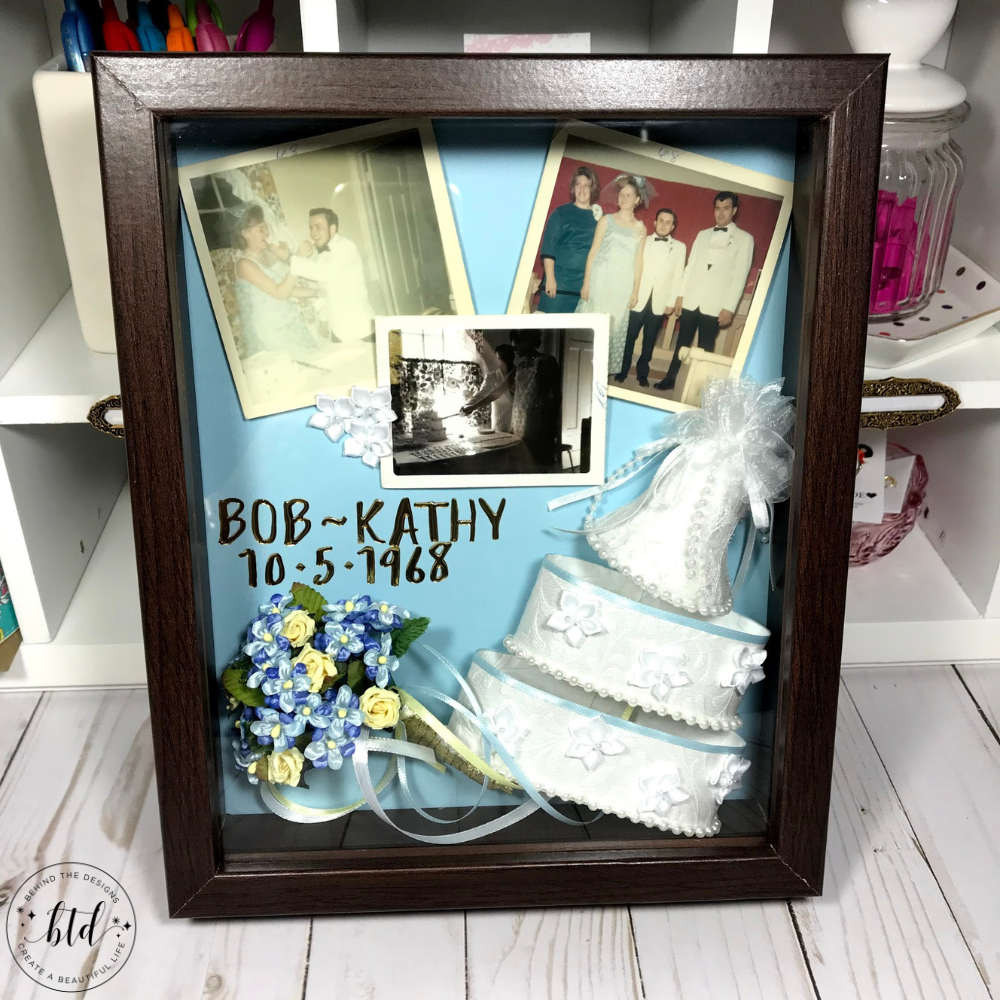
In their case, the bride wore a light blue dress and the men wore white suit coats. Their cake topper was a white double wedding bells decoration and their wedding colors were blue, yellow and white.
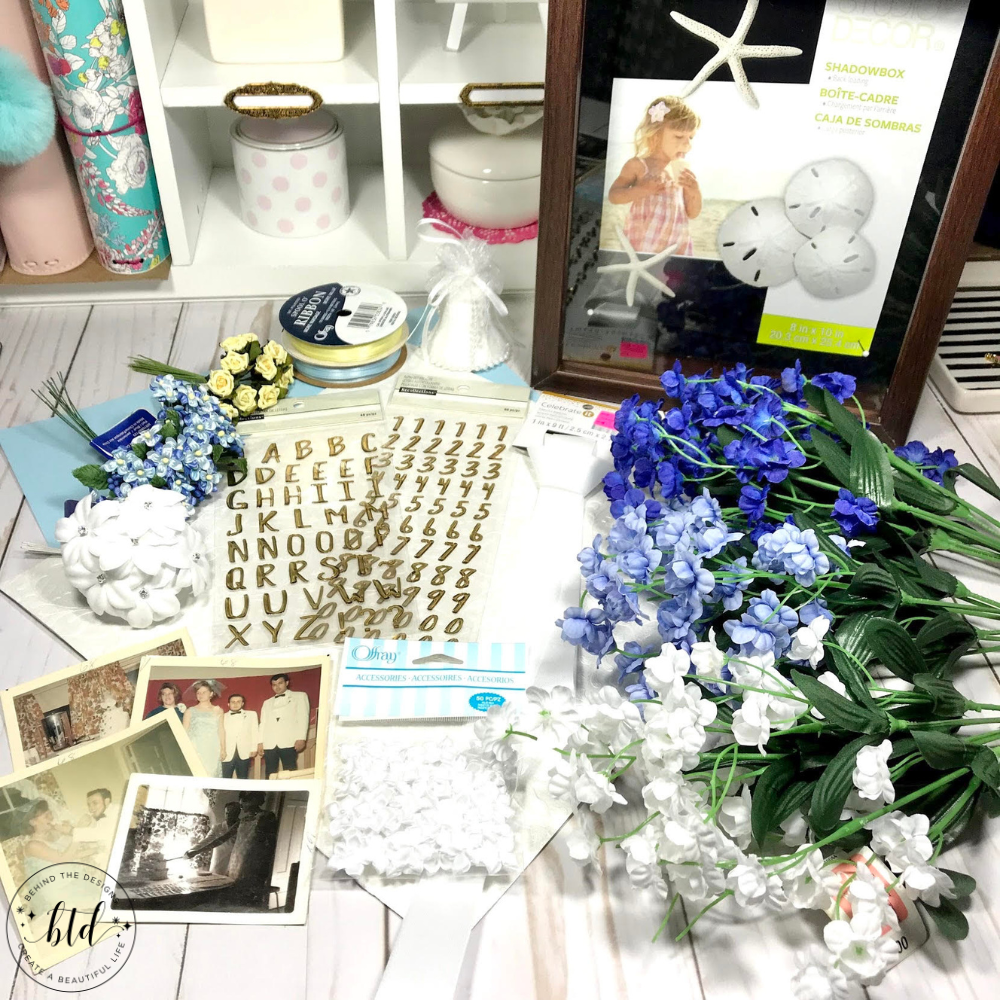
Supplies
Most of the supplies are from Michaels.
- Vintage wedding photos
- Flower picks of little blue flowers and yellow silk roses
- White, yellow and light blue ribbon
- White wedding bell decoration
- White silk flowers
- Scrapbook paper in light blue
- Scrapbook paper in a pearly white with a rose textured pattern on it
- Strand of small white pearls
- 1/2″ Wide Dark Green Floral Tapes for Bouquet Stem Wrapping
- Gold puffy letters and numbers (I picked these up at Michaels)
- 8×10 Shadow Box, Black Frame with Linen Back
So let’s jump into the details!
DIY Keepsake Anniversary Shadow Box
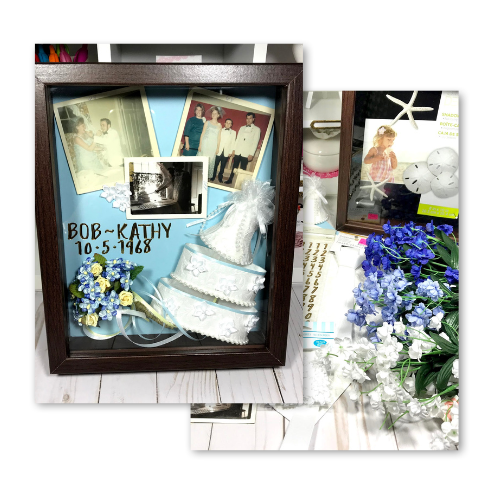
My in-laws had a small, unfussy wedding. There were not a lot of details to incorporate. I did focus on their wedding cake and photographs.
Design Process
Happy 50th Anniversary!
They both loved their wedding anniversary shadow box gift. This shadow box now resides on their family picture wall as a reminder of their special day.
The happy couple celebrated their 50th wedding anniversary in 2028. Little did any of us know that my mother-in-law wouldn’t be here for her 53rd anniversary.
Our days are busy and we are all working off of fumes sometimes. It’s at those times, we have to stop and remember just how important it is to treasure every day. You never know what tomorrow brings.
“The possibilities to create are limited only by your imagination and passion for uniqueness.”
Stephanie
Founder of Behind the Designs

Anniversary Gifts by Year
Many interpretations of this anniversary gift ideas list exist and the ideas listed below are just a suggestion. Take inspiration from this post and be creative in your gift giving, year round.
- 1st Anniversary -Paper or clocks
- 2nd Anniversary -Cotton or china
- 3rd Anniversary -Leather or crystal/glass
- 4th Anniversary -Fruit/Flowers or linen/silks
- 5th Anniversary -Wood
- 6th Anniversary -Candy or iron
- 7th Anniversary -Wool or brass
- 8th Anniversary -Bronze
- 9th Anniversary -Pottery or copper
- 10th Anniversary -Tin/Aluminum or diamond
- 11th Anniversary -Steel or fashion jewelry
- 12th Anniversary -Silk/Linen or pearls
- 13th Anniversary -Lace or textile
- 14th Anniversary -Ivory or gold jewelry
- 15th Anniversary -Crystal
- 20th Anniversary -Porcelain
- 25th Anniversary -Silver
- 30th Anniversary -Pearls
- 35th Anniversary -Coral
- 40th Anniversary -Ruby
- 45th Anniversary -Sapphire
- 50th Anniversary -Gold
- 55th Anniversary -Emerald
- 60th Anniversary -Diamond
Remember to have fun with your gift! Take the suggestions and come up with a unique way to create a gift.
Were you inspired to create an anniversary gift idea?
Mention us @behindthedesigns or tag us using #btdinspired so we can see your creations! You can also leave a comment below!


Want to always be in the know? Be sure to subscribe to the newsletter to receive emails of all the latest blog posts and get the first scoop about any digital printables and freebies.
Join me on Instagram, Pinterest, Facebook and the Creative Planning Expressions Community to see what I’m up to as I Create a Beautiful LifeTM!


