DIY Curio Cabinet Makeover Transformed and Refreshed with Paint
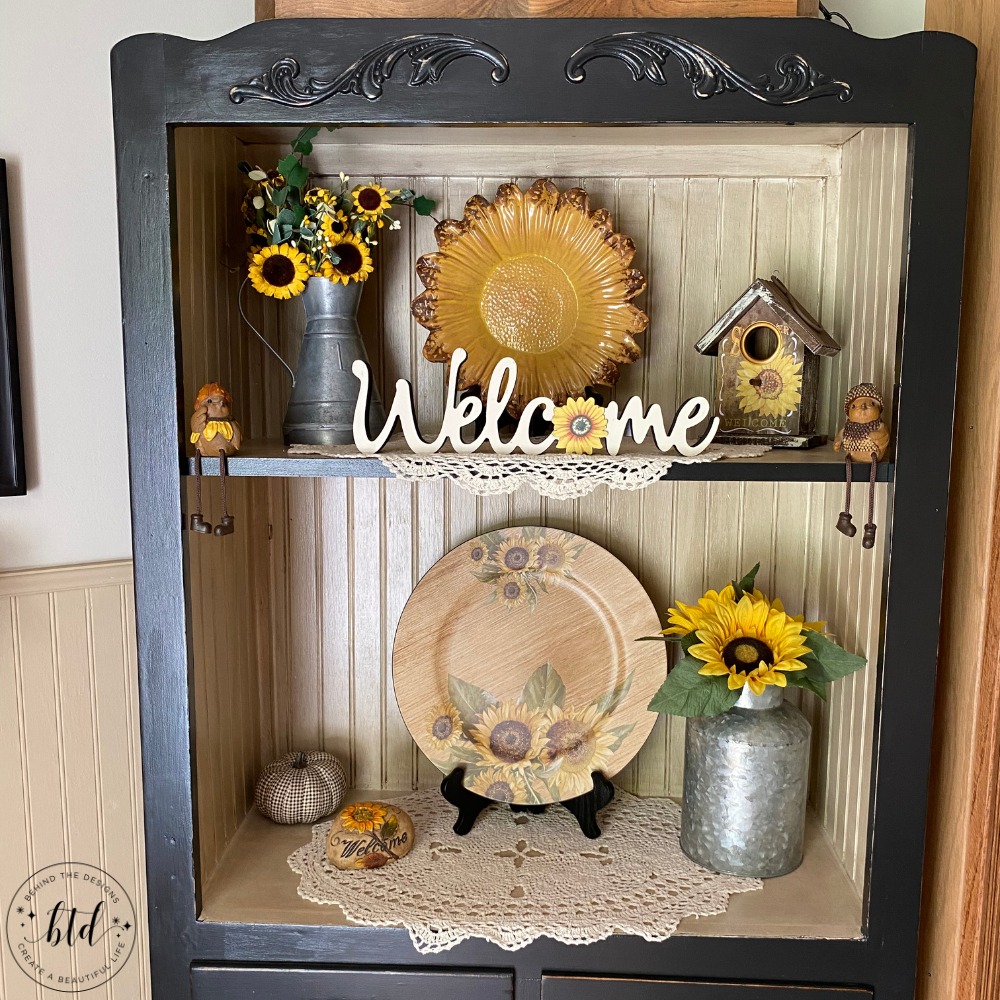
Breathe new life into a tired piece of old furniture simply by painting it! This DIY Curio Cabinet Makeover has been repurposed, given a coat of paint with some antiquing and some new handles. Check out below how I transformed this piece!

You’ve no doubt seen my other before and after projects like the DIY Trash to Treasure Sitting Bench Makeover; so you know how much I love a good furniture makeover! This DIY was made even sweeter because it was a curio cabinet that we were given when my grandfather-in-law passed away. Now it’s a grand farmhouse curio cabinet in our entryway!

don’t miss out!
Get more furniture makeover project ideas plus tips and tutorials!
Transforming and refreshing furniture is such a rewarding project to take on. With just a little elbow grease and paint you can completely transform furniture and give new life to what would otherwise have been discarded. The best part about DIY painting your own furniture is you can change your mind anytime you want!
I will preface this post with the fact that this was a DIY project that was done many years ago. As a result I wasn’t very good at getting before pictures or process pictures. But I wanted to share this with you nonetheless because it’s a great transformation project!
Supplies
- Cabinet or furniture piece of choice
- Natural wood wainscoting
- Foam paint roller
- Paint pan
- Dropcloth
- Paint brush
- Black paint (I used Glidden Premium Paint + Primer in Deep Onyx CN65)
- White paint (I used Olympic One Paint + Primer in Colonial White, Eggshell)
- Wood stain color of choice
- New knobs, pulls and hinges (I chose the Buffalo Check Pulls found at Hobby Lobby)
We acquired this vintage oak curio cabinet in 2010 but I didn’t start working on it until about 2014. It took me a lot of time to decide how I wanted to use it in our home which ultimately helps to give direction on how to transform it.
DIY Curio Cabinet Makeover Transformation
One thing about my DIY furniture makeovers that I really need to improve on is actually getting the before picture. I always see the potential in any piece and will set it aside until I’m ready for it. Sometimes a vision takes hours, days or even…years!
During that waiting time I’m always chatting up my husband with the details of my projects. So he was aware of what my plans were for this curio cabinet.

That said, I didn’t realize my husband had already started taking it apart. So this is the only grainy before picture I have with it in the dark basement. The top had thin double-glass doors, a flat wood back and the bottom had solid wood doors. The handles were those thin silver ones that you typical find on metal cabinets that look similar.
When this picture was taken, it was already unassembled and my husband had already started putting in the wainscoting along the back and sides of the top half. From here he completely sanded down inside and out the entire curio cabinet and wiped it down.

1
Add Wood Scrolls To Top
To give this furniture makeover a little more uniqueness, I had my husband add two wood scrolls to the top of the curio cabinet (before painting). As you can see I again forgot to get before pictures.
He simply used some wood glue and adhered them directly to the cabinet. We let the curio cabinet sit for 24 hours before painting it.

2
Paint The Cabinet
Painting this curio cabinet was a multi-part process. There was the black paint for the base, doors and drawers; white paint for the inside of the cabinet and; lastly there was the gel stain to give the upper part of the cabinet an antiqued look.
Shown above is the fully painted curio cabinet without the gel stain. Since we did not plan on putting the upper doors back on, we plugged the holes from the hinges before painting.

To paint the bottom of the shelf and the “feet” or bottom legs I balanced the curio cabinet on two step stools. The challenge here was keeping our cats out of the cabinet…which they thought was simply a box to play in!
Not shown is one shelf that will go in the upper half of the cabinet. It was painted and treated with the same gel stain as the rest of the upper cabinet.

3
Create and Paint New Doors
While I was painting the curio cabinet, my husband was creating some DIY doors to work with the new transformation. Sadly, he did not get pictures to share.
To paint the doors I used the same black paint and gave it two coats; letting each coat dry 24 hours before painting the next coat. Originally this curio cabinet had all the hardware showing on the outside of the cabinet.
With the new transformation I did not want the bottom door hinges showing. So we added them to the inside of the cabinet doors.

4
Add Gel Stain To Wainscoting
This DIY project was nearly finished and I loved how it’s turned out! The next step was to give the upper half of the curio cabinet some added dimension using gel stain. This is a great technique to give an antique appearance without waiting years for the aging process!
To create this look I simply used a foam brush to brush on some stain, gave it a second, then used an old t-shirt to wipe the stain off. Depending on the color gel stain you use you may have to do multiple coats but my tip is to do this step in parts. Don’t do a full area and then wipe because the stain will already start to dry.

Another tip…let the gel stain dry throughly before moving the cabinet or touching that area. As you can see, lesson learned! By the way, I did fix this spot.
I did not gel stain the bottom interior.

5
Choose Handles & Lightly Sand
The last two steps were to choose handles for the drawers and use a fine grit sandpaper to antique some of the edges.
The beauty of using sandpaper to give wood an antique look is that you can antique anywhere you’d like. Sometimes there’s been a little wear on the middle of a shelf or side of the curio cabinet. Be organic with where you place your antique sanded marks.

Now that I’ve finally shared this much overdue furniture makeover project, I’m getting the itch to update it once again. I’ve been thinking of giving it a lighter paint update -what do you think? Drop me a comment!
Were you inspired to diy a furniture makeover?
Mention us @behindthedesigns or tag us using #btdinspired so we can see your creations! You can also leave a comment below!


Want to always be in the know? Be sure to subscribe to the newsletter to receive emails of all the latest blog posts and get the first scoop about any digital printables and freebies.
Join me on Instagram, Pinterest, Facebook and the Creative Planning Expressions Community to see what I’m up to as I Create a Beautiful LifeTM!


This is such an amazing transformation! I’ve been wanting to refinish a shelving unit, but I’ve been at a loss for how to do it. I love how you used both paint and gel stain to give it a more antique look. I never would have thought to do that. This has seriously given me some really good inspiration for my own project! Thanks so much for sharing!
Thank you Alex! I’m so glad this post and furniture makeover has inspired you for your own project! Giving old furniture new life is best project to take on because the results are nothing short of amazing. Have fun refinishing your shelving unit!