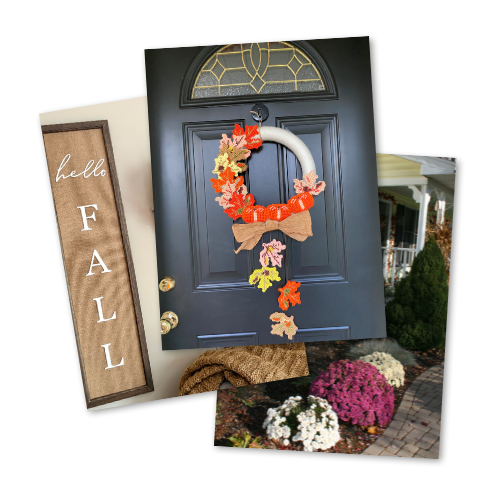
Falling Leaves Door Wreath Reimagined
It’s important that we treasure the homemade gifts given to us. But what happens when that gift breaks or falls apart? Don’t throw it out! You just need to get a little creative. Check out this inspiring Falling Leaves Door Wreath Reimagined using the original components!

At the beginning of this year I started a cleaning challenge using this January Declutter Checklist to organize my home. During that process I came across an old door wreath that I had received as a gift from my mother. I don’t even remember how but the wreath had broken apart and I just wasn’t able to part with it. Boy am I glad I didn’t! All the crafts that my late mother made me over the years have become such treasured keepsakes now (even more than they already were).
don’t miss out!
Would you like more Fall Home Decor & easy Craft Ideas? Be sure to subscribe to get the latest ideas delivered right to your inbox!
When fall arrived I decided it was time to pull out this wreath and figure out how to fix it. I knew it would make the perfect addition to my front porch fall decor because it fit my theme so nicely. Although it took months to decide on a final design setup. In hindsight I think the reason it took so long to come to a decision on the design was because I didn’t want to damage it any further.
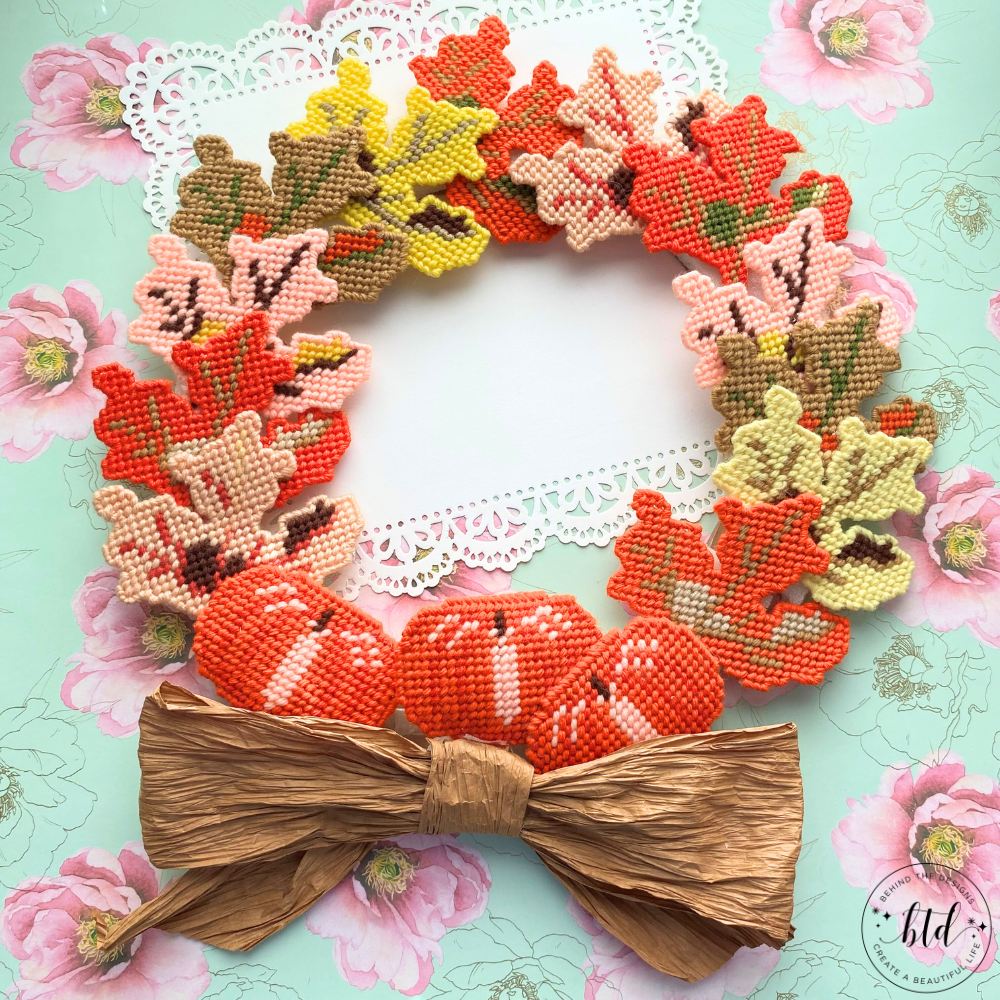
In case you hadn’t figured it out yet, I didn’t create the leaves or bow -my mother did. For the leaves she used plastic canvas as the base and various colors of yarn for the leaves. I was always in awe of my mothers’ craftiness. She could look at a yarn design and create it without even reading the instructions.
Falling Leaves Door Wreath Details
Her craft of choice was to work with yarn and she made so many things over the years. She liked to give them away as gifts. I remember telling her once that she should be getting pictures of all her crafts. But she crafted purely for herself and then shared her beautiful crafts with those she knew. Of course, I have quite a few items, mostly afghans, that I still treasure today and I treat them very tenderly as I don’t want to ruin them.
1
Original Door Wreath
When the wreath was originally assembled, each piece was attached to a flat styrofoam ring using hot glue. When the wreath broke it snapped the styrofoam ring in two places.
To start I needed a reference point. So I set the wreath up on the table like it looked originally. My goal was to get a picture of how it used to look so I could reference it as I came up with possible design choices.
2
Gather Wreath Supplies
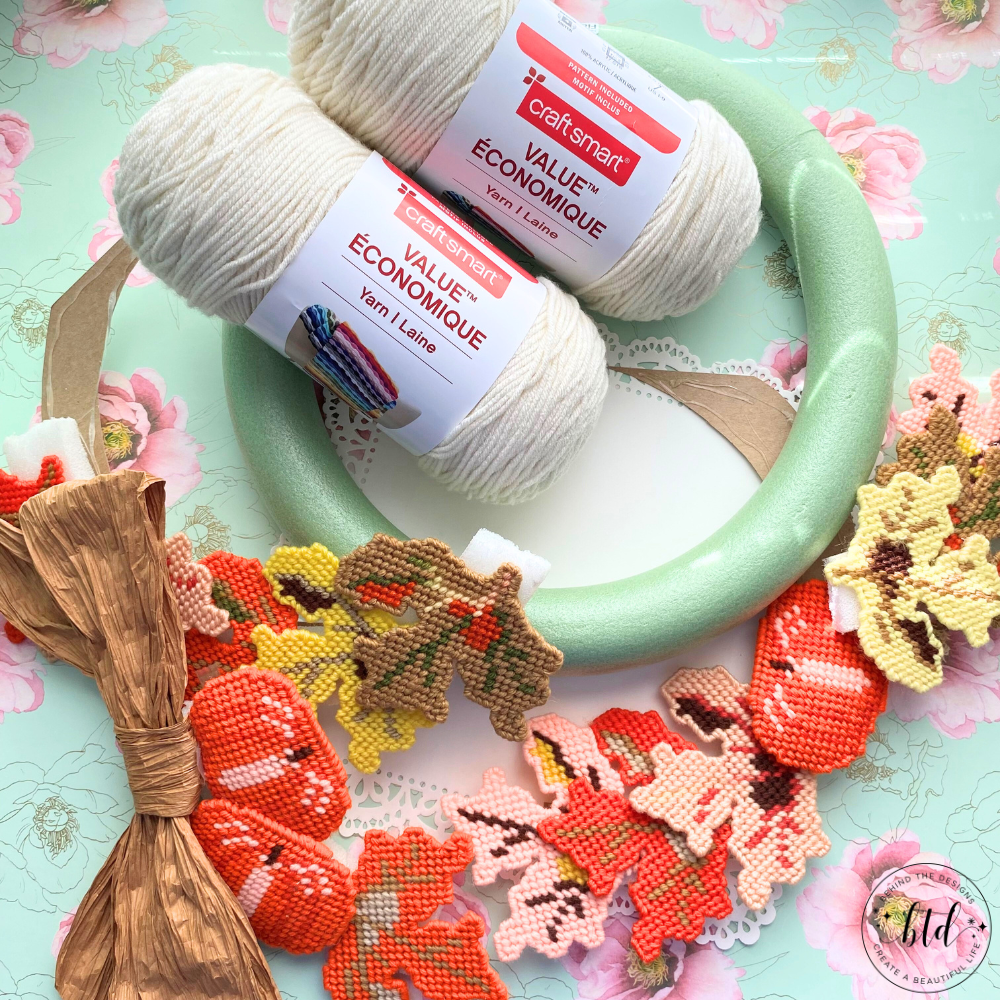
As I pondered how to assemble the wreath I had the option of putting it back together the same as it was originally or come up with a new design. One idea that kept coming to mind was wrapping a styrofoam ring with yarn and assembling the leaves around that. I did like that idea so I decided to go that route.
The next challenge was deciding on a yarn color that would compliment the colors that were already in the leaves and pumpkins. All the colors proved difficult to find, mostly because this wreath was at least 18-20 years old and I don’t know what brand yarn my mother had used. I settled on using an off white color yarn.
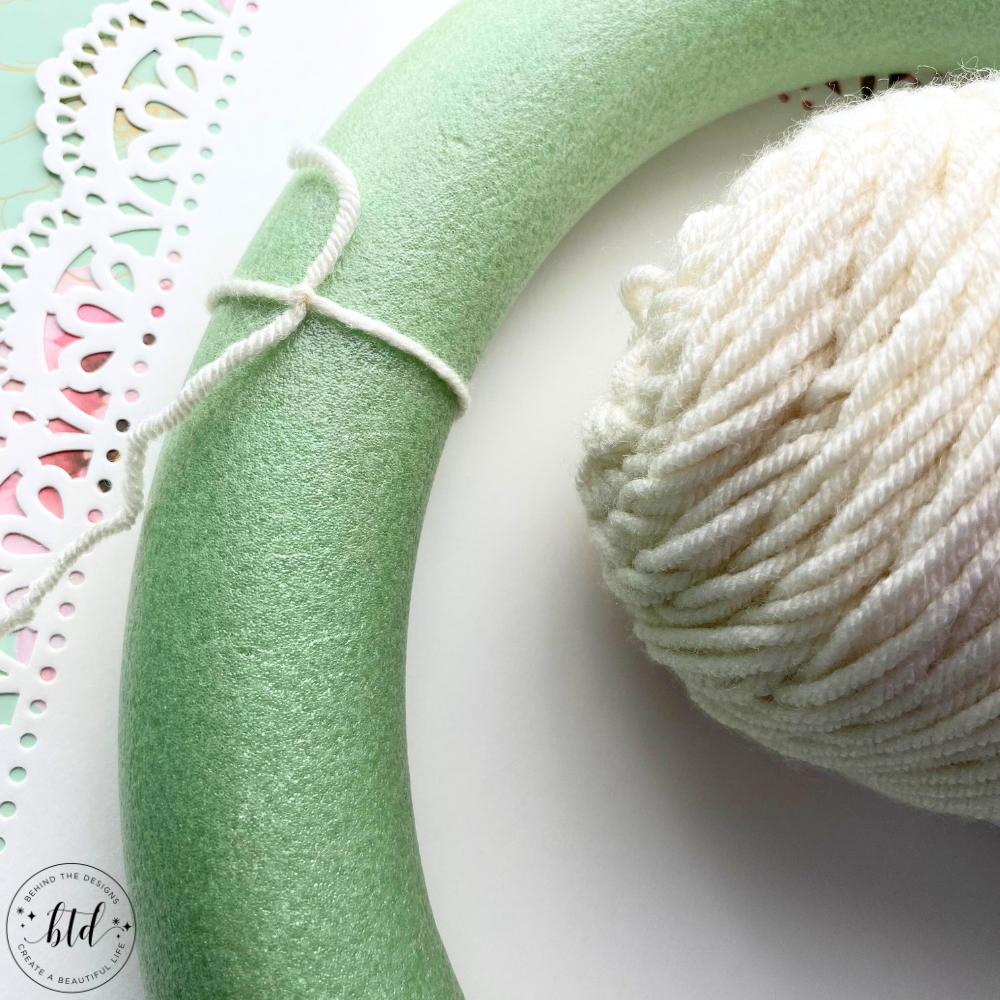
3
Wrap Foam Wreath With Yarn
Since the styrofoam ring had a 14″ diameter it was going to take a while to wrap the entire ring. To start I simply tied a knot with the yarn and started making wrapped loops around the ring. Only a short way into doing this I realized I needed something to keep the yarn in place but didn’t want to use hot glue. This is where double sided sticky tape came into play and it worked perfectly.
4
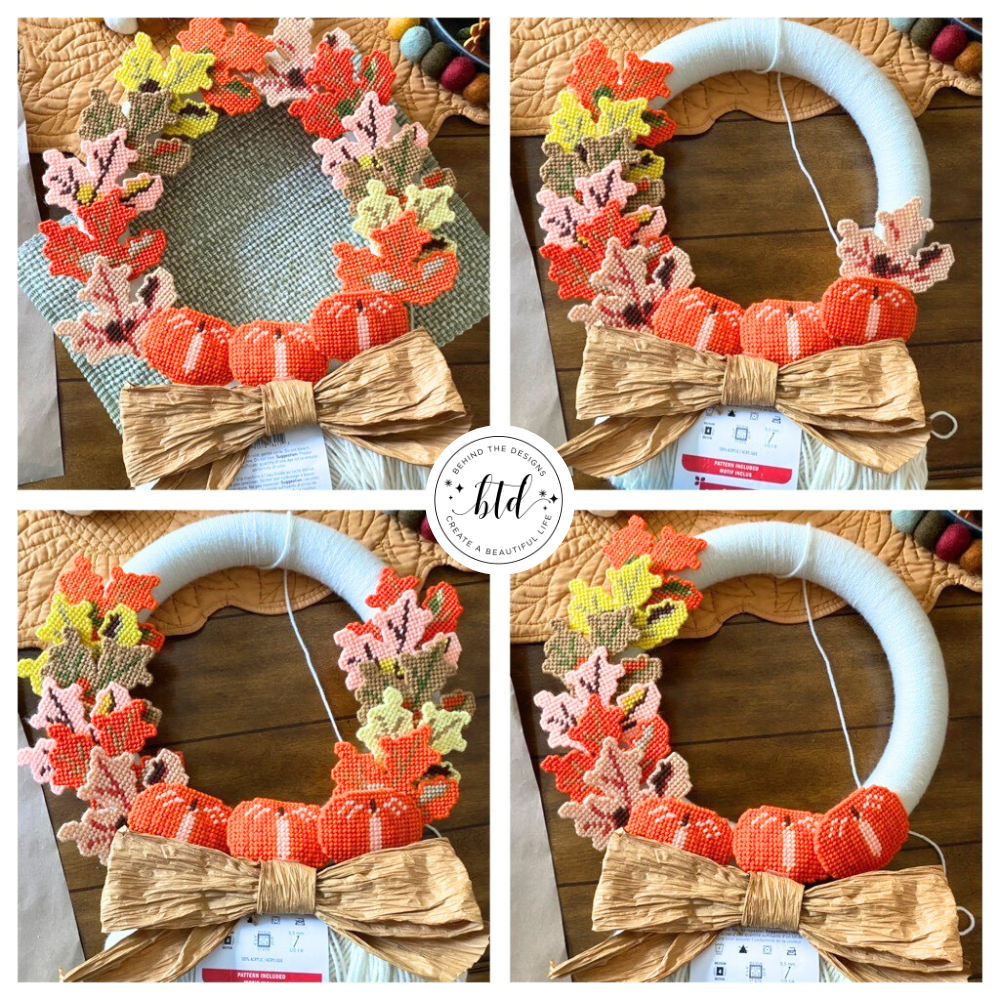
Arrange Leaves on Wreath
Once the ring was fully wrapped it was just a matter of deciding on how to arrange the leaves, pumpkins and bow. The first option was the same as the original design. While this was still a very beautiful setup I just kept feeling pulled to do something different. When I originally thought of the yarn it was with the intent to have it showing on the wreath.
After consulting a friend on her thoughts I decided to go with option #2 (top, right). The only caveat of going with this setup was I’d have extra leaves. That’s when I decided to use a dark brown embroidery thread to hang a few leaves as if they were falling from the trees.
5
Assemble Leaves and Pumpkins On Ring
All of the leaves and pumpkins where attached using hot glue. First I started with gluing on the leaves; next I had to get the “falling leaves” strung on before I could glue on the pumpkins and bow. The reason was because if I glued down the pumpkins I wouldn’t have been able to get the string in the proper place for each “falling leaf”.
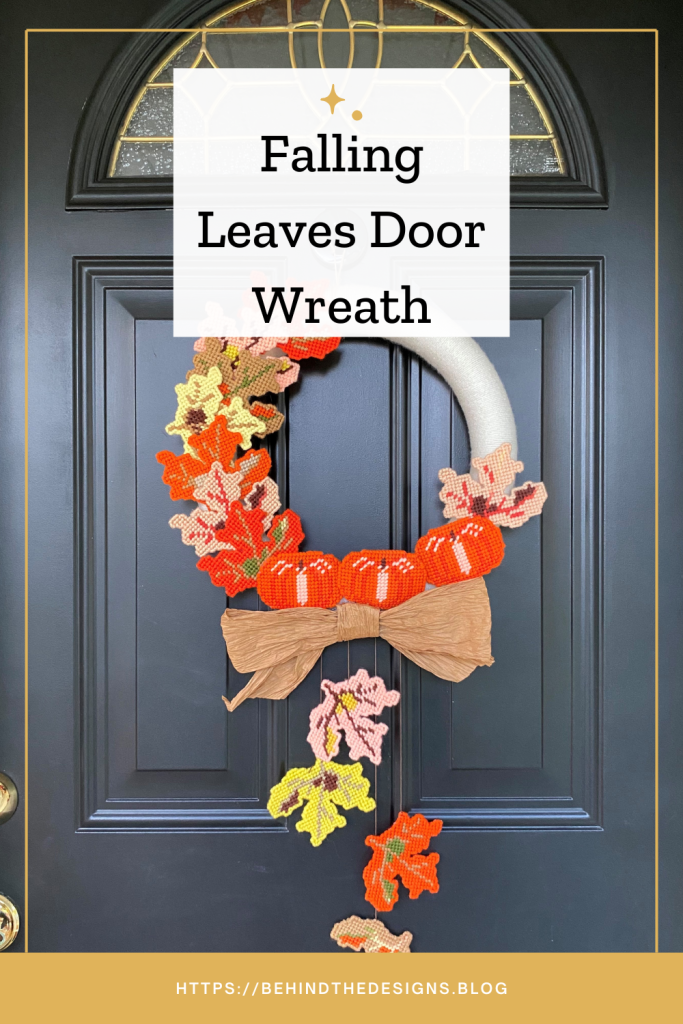
Overall I love how it came out and I’m so happy to be showing it on my front porch door again. This door wreath will be in place through the Thanksgiving weekend, which is traditionally when we decorate for Christmas.
Final Design Thoughts
What I really love about having reimagined this falling leaves door wreath is it’s like having a piece of my mom around and welcoming all our guests into our home. Once the fall season ends and we start decorating for Christmas, I’ll be able to pull out my own personal collection of angels, most handmade with love, by my mom that will adorn our traditional Christmas tree.
What design option did you like for the door wreath? Comment below, I’d love to hear from you!
Did you make this recipe?
Mention us @behindthedesigns or tag us using #btdinspired so we can see your creations! You can also leave a comment below!

Want to always be in the know? Be sure to subscribe to the newsletter to receive emails of all the latest blog posts and get the first scoop about any digital printables and freebies.
Join me on Instagram, Pinterest, Facebook and the Creative Planning Expressions Community to see what I’m up to as I Create a Beautiful LifeTM!