The mini Happy Planner™, by Me and My Big Ideas (MAMBI), began to rollout in mid to late October. The planner community was, to say the least, super excited to get their hands on this new planner. I joined in that excitement as I saw this perfect little size to be, well, perfect for my purse. The first roll out locally (for me) was to Hobby Lobby.
For previous Happy Planner rollouts, I would travel 23+ miles (1/2 hour) each way, almost every weekend looking for the coveted new planners. I never seemed to catch the few that were in stock. When the mini Happy Planner™ started rolling out across the U.S., I, along with so many others, were frustrated when our local stores seemed to be last to get them. It kind of killed the excitement a little. But, lucky for me a wonderful fellow planner in Texas offered to pick up my mini Happy Planner™ of choice (Get it Girl) and ship it to me. I was, and still am, so grateful she did this for me. Thank you April!!
Of course, with the new mini came the planner conundrum, “How should I decorate my mini planner?” Up to this rollout, I had amassed a huge sticker collection (shhhh! Don’t tell my husband! Yikes!). So, naturally, my first inclination was to try and use what I already had. I also decided to just start using it before deciding how I wanted to decorate it (which is not something I did with my classic Happy Planner™ and regretted it).
Don’t worry if you mess up a page though. Check out my Planner Tip #3 How to Fix Pre-Decorated Happy Planner Pages for an easy fix.
Let’s Start Decorating!
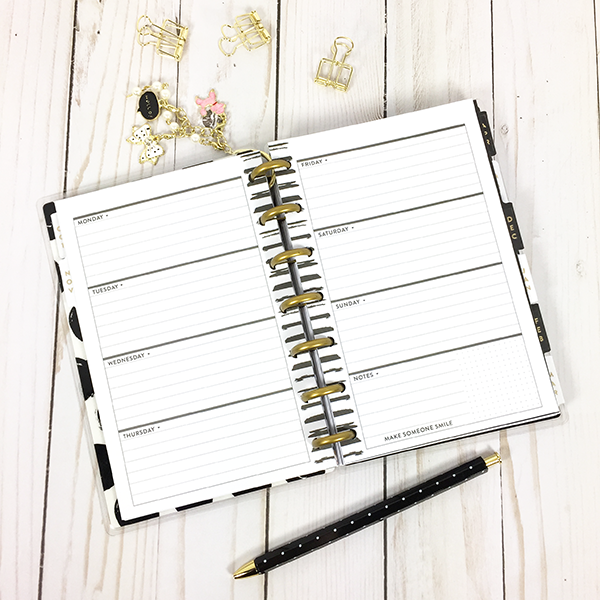
A blank slate. I’m not sure how all of the other mini’s look inside, but, this is what you get with the Get it Girl mini Happy Planner™. I actually appreciated the blank slate because there was no color to have to cover up, I could just literally do what I’d like with it. I also loved the idea of being able to work with a horizontal layout this time. But, ask any planner including me, and well, the blank slate is just too boring to plan on -and that’s when I get creative!
Decorating Option #1
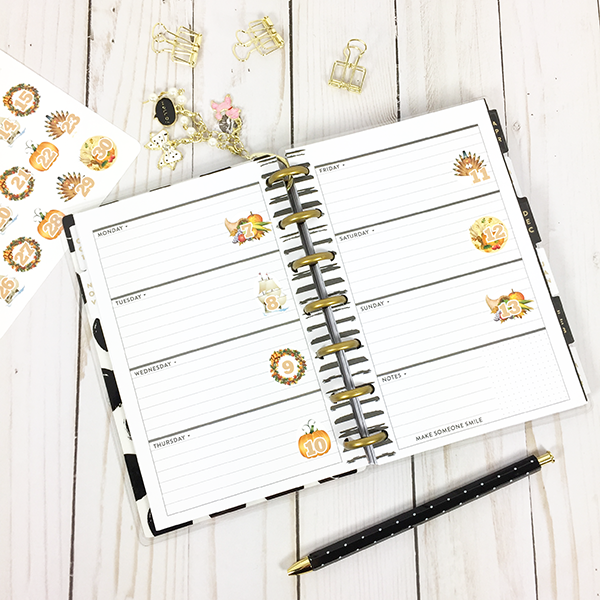
Add decorative numbers for the dates. The first thing I did was use the Days of the Month stickers from Jump To It Designs. I originally purchased the October Halloween Countdown stickers for my classic Happy Planner™. But, then I realized they would also go perfectly in the mini! As I played around with decorating ideas in my head, I jumped the gun a little and used the November 7th-13th numbers only to realize for that week, that’s not what I wanted (more on that later in this post).
Decorating Option #2
Add classic size half box stickers. For each of the weeks’ shown below, I used left over stickers from the monthly kit and weekly theme sets after I decorated my classic Happy Planner™. I found the best size sticker to use in the mini Happy Planner™ are the half box stickers. If you want more of a festive feel to your planner pages, the holiday days of the week countdown stickers work perfectly! All stickers listed are from Jump To It Designs, unless otherwise noted.

You could also take full size task list stickers from Happy Planner or other designers’ and cut them in half to fit the horizontal mini Happy Planner. Stickers shown above are the following Jump to It stickers/kits:
- Halloween #2 stickers (left overs from a sticker purchase I previously made)
- October Halloween Countdown / Days of the Month stickers
- November Countdown / Days of the Month stickers
- Fall Giving Thanks (2-sheet) stickers
- Steps Daily Tracker Planner stickers
- Scale Planner stickers
- Hand-lettered the Month and Year
Decorating Option #3
Use cardstock paper & paper punch. On this weekly spread I decided to create my own date flags using cardstock I had on hand and a flag paper punch. To make them fit, I simply turned them sideways and glued down.

Of course you could also cut a little off the top of the flag and then you would be able to set them on the page in a top-down fashion. I then hand-lettered the month and year -although notice the month is wrong. Ugh. I was so excited to be practicing my hand lettering that I messed up the month! Stickers shown above are the following Jump to It stickers/kits:
- Welcome Fall Weekly Sets/Kits
Decorating Option #4
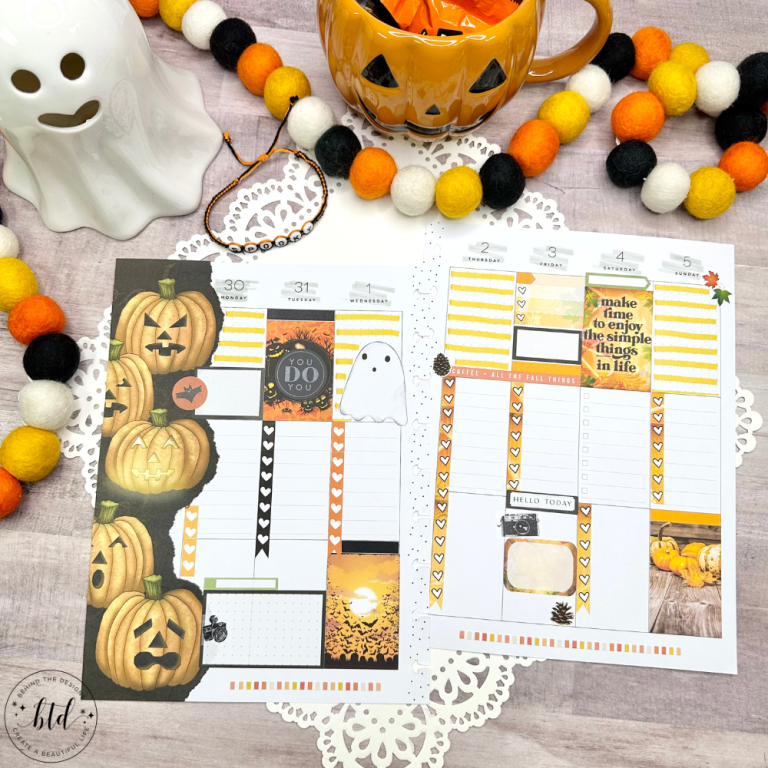
Use ALL the stickers. Before hand-lettering the month and year, got the right month -check! On this option I used as many of the left over stickers as I could. Notice I took a full task list sticker and covered it over two days. I did that because most times, I have a larger to-do list on the weekend days.

If you are a new planner or have OCD, it can be hard to randomly put stickers down. But, trust me, just throw them where they feel right and don’t be shy about finding a coordinating washi tape to add a little here and there. Stickers shown above are the following Jump to It stickers/kits:
- Fall Autumn Full & Half Boxes stickers
- Fall Giving Thanks (2-sheet) stickers
- Fall Sampler #1-6 sheet stickers
- Steps Daily Tracker Planner stickers
Decorating Option #5
Use those decorative full boxes & washi. I really love how the following layout turned out. Those full boxes are perfectly balanced and that polka-dot washi -oh my!

This spread was also Thanksgiving and Black Friday week. I also pulled out my hand-dandy label maker for the month and year so that it would stick on top of the decorative washi. Stickers shown above are the following Jump to It stickers/kits:
- Thanksgiving November Turkey stickers
- Thanksgiving Half Box stickers
- Monthly Day Numbers Planner stickers (these fit perfectly in both the Mini monthly and weekly spreads!)
- Everyday Girls: Rosie (isn’t she adorable!)
- Recollections Washi Tape (Michaels Crafts)
- Steps Daily Tracker Planner stickers
- Scale Planner stickers
- MAMBI Seasonal Sticker Book #1557
Decorative Option #6
Use notepad paper for a full page list. ‘Tis the season to be busy. Once Thanksgiving comes, it’s full on Christmas mode. That means I have a lot of things to-do. Luckily, with the last week of November having only three days to fill in, I found myself staring at a completely blank right side of the week. To keep me organized, I got creative and setup the beginnings of a holiday shopping list using a piece of notepad paper (that I believe I found at the Target Dollar Spot). Simply taped it down and used some washi as the border.
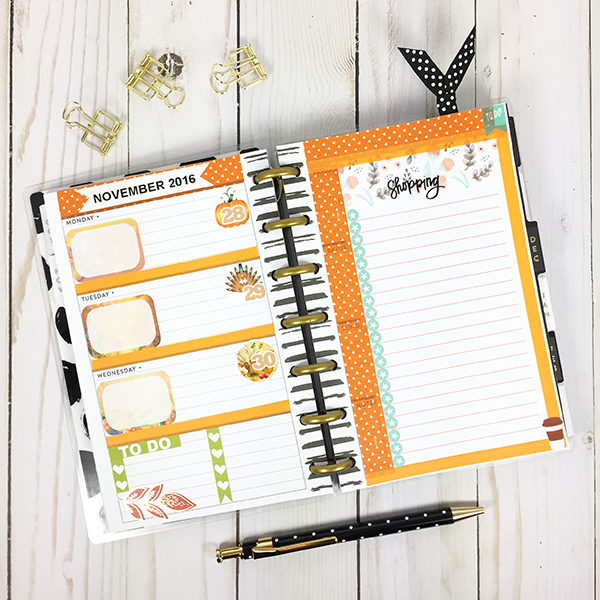
I then used some Happy Planner circle star task list stickers to add a little dimension. Can’t forget that coffee cup sticker….it’s also the season of coffee. Again, I used my label maker for the month and year. Stickers shown above are the following Jump to It stickers/kits:
- Fall Giving Thanks (2-sheet) stickers
- Fall Thanksgiving Half Box stickers
- November Countdown / Days of the Month stickers
- Recollections Washi Tape (Michaels Crafts)
- MAMBI Seasonal Sticker Book #1557
- MAMBI Sticker Book #1829
- Elegant & Organized (Coffee Cup)
Now, I’m ready to head into December –shopping list in hand!
During the month of November, I coordinated each weekly spread in both the classic Happy Planner™ and the mini Happy Planner™. Although this style is not for everyone, for me, it’s easier on the eyes and creates a flow from planner to planner.
Happy Planning!

I would love it if you subscribe to the newsletter at the top of the page in order to receive my emails of all my latest blog posts and get the first scoop about any digital printables and freebies.
You can also follow me on Instagram, Pinterest, and Facebook to see what I’m up to as I Create a Beautiful LifeTM!
Disclosure: I received free stickers from Jump To It Designs Inc. to review. All opinions expressed are completely my own.